How to Start Street Photography - A Definitive Guide for Beginners
Introduction
Street photography is the kind of photographic genre that you can do without too much fuss. Unlike Landscape Photography, you seldom need to get up at the crack of dawn. Unlike Wildlife Photography you don't need to spend hours waiting in insect riddled grass waiting for your subject to walk into frame, and you don't need to ask people to pose in a certain way and fiddle around with bright lights, as you would with portrait photography.
As a Street Photographer, you can simply pick up your camera and go outside!
So how do you get started? How do you learn street photography?
Let's get into it.

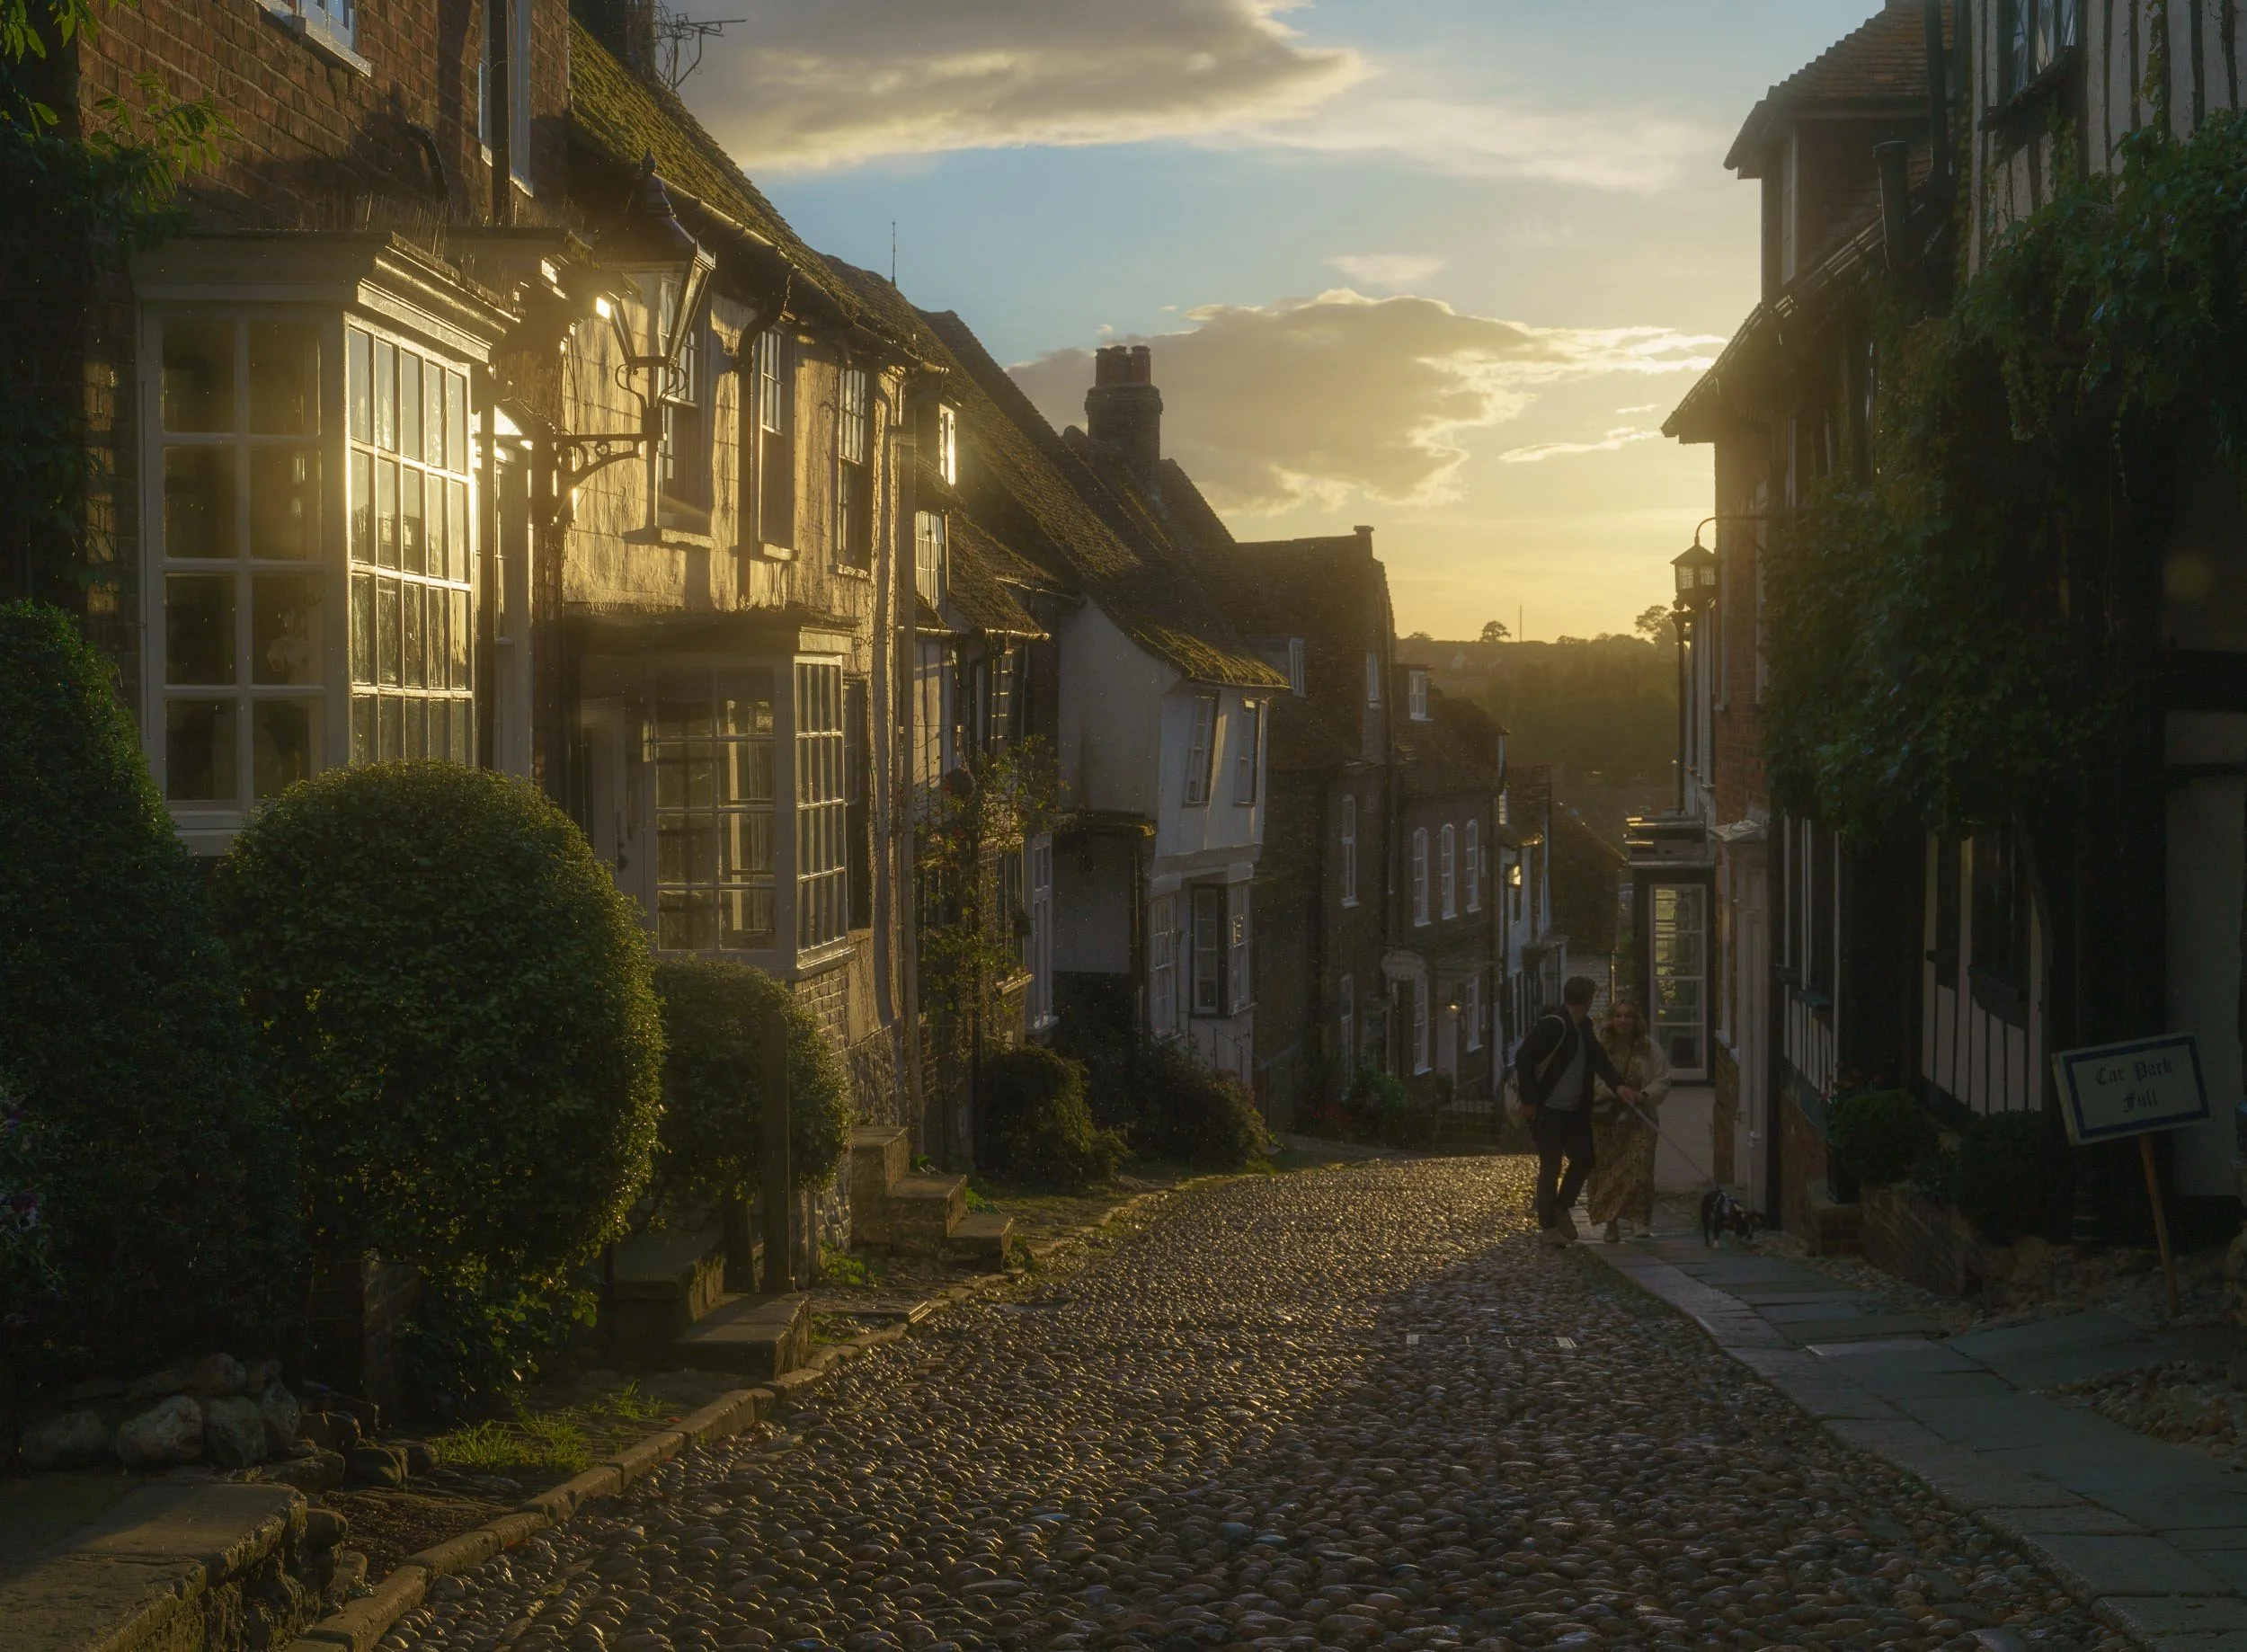
Urban Landscapes
The Sub Genres of Street Photography
There are numerous kinds of street photography. It's not all about getting into peoples faces with your camera on busy streets.
Urban Landscapes
You don't need to include people in your street photography images. You can simply focus on shooting streets, buildings, seafronts, derelict buildings, promenades. The list is endless. When shooting urban landscapes, you can slow down and, take your time making sure your composition is on point. You can use a tripod and shoot using slow Shutter Speeds because you are not handholding the camera. Using fast Shutter Speeds is much easier when holding the camera by hand. However, slow Shutter Speeds cause motion blur, therefore you need to use a tripod.
Street Portraits
If you want to improve your confidence, there is nothing like going up to strangers with your camera and asking them if you can take their photos. Make sure you have your settings ready before you ask them as you don't want to have them wait while you fiddle around with camera dials. Also, remember to send them a copy of the photo via email or messenger.
Night Street Photography
My personal favourite. If you want instant atmosphere in your images, then shooting at night is the route to take. With street lamps and shop lights lighting up your scene, everything takes on a whole new ambience. One of the great things about night street photography is that you are forced to learn your settings quickly. Most of the time, at night, you are using a much higher ISO than in the daytime as well as slower Shutter Speeds and wider Apertures.
Slow Shutter Speed Street Photography
Street photography is usually done with fast Shutter Speeds in order to capture the action sharply and in focus. When you use slow Shutter Speeds your subjects will look blurred and will get even more blurred the slower the Shutter Speed you use. This can look quite beautiful when you capture somebody standing still and all the people around them are looking like blurry streaks or are completely invisible because you have used a very slow Shutter Speed.
Projects - Focusing on a Specific Theme or Technical Aspect
This is a whole subject in itself but can also be very good for beginners to try out. Many street photographers like to divide their work into projects. This gives the street photographer focus (pardon the pun) and allows them to create a body of work that is distinctive and worthwhile.
You can get really creative and specific with whatever you'd like to use as a project.
Here are a few ideas.
Shooting at a specific focal length - only taking shots with a 28mm lens or 35mm.
Using a specific Aperture, such as f /2.8, would create photos that have a creamy bokeh.
Emotion - Specifically looking for people who are looking or acting emotive can be a beautiful way of telling a story.
Light and shadow - specifically seeking out areas where there are pools of light among shadows and waiting for somebody to walk into the light area.
Details - focusing on specific aspects, such as hands, glasses, pets, shop windows, handbags, etc.
Contrast - looking for things and people that juxtapose. Ie: an old lady surrounded by children. An overweight person walking past a slim fast advert. a nun walking into a dark tunnel. These are quite extreme examples, I know, but I'm just giving you an idea of what you can do with juxtaposition.
Possibilities really are endless when thinking of ideas for projects.
What equipment to use
Camera
If you're just getting started then there is no harm in using your mobile phone to take photos. However, phones don't have the ergonomics of a pocketable camera. There are many pocketable street photography cameras for beginners. Here are just a few selects for you to peruse.
Panasonic Lumix LX100 II
A large 22.1MP Four Thirds Sensor, with a fixed Lens: 24-75mm (equivalent) f/1.7-2.8. It only weighs 392g (including battery). ****IBIS included.
B&H Adorama Wex Park Cameras Amazon Amazon UK
Ricoh GR III
I have just purchased one of these. It has a great 24MP APS-C Sensor with a 28mm (equivalent) f/2.8 lens. It's ridiculously light at only 257g (including battery). IBIS included.
B&H Adorama Wex Park Cameras Amazon Amazon UK
Ricoh GR IIIx
The same camera as above but now with a 40mm lens. With this camera, you don't have to get so close to your subject as you would with a 28mm fixed lens. 262 g (including battery). IBIS included.
Sony RX100 VII
This powerful camera has a 1-inch sensor which is 20.1 megapixels and an impressive 24-200mm (equivalent) f/2.8-4.5 zoom lens. It makes things easy with a fantastic autofocus system and weighs only 302g (with battery and SD card). IBIS included.
B&H Adorama Wex Park Cameras Amazon Amazon UK
Fujifilm X100 V
A fantastic APSC 23mm fixed lens camera with a well-regarded APS-C-format 26.1MP X-Trans CMOS 4 sensor. This camera weighs only 478 g (Body with Battery and Memory).
B&H Adorama Wex Park Cameras Amazon Amazon UK
Fujifilm X-Pro3
A superb camera for street photography with an excellent 26.1MP APS-C sensor. This camera takes interchangeable lenses so it is a bit heavier, however, 35mm lenses can be bought quite cheaply and they are quite low on weight. The X-Pro 3 weighs only 497g (including battery and memory card)
B&H Adorama Wex Park Cameras Amazon Amazon UK
Lens
If you have an interchangeable lens camera or if you would prefer to pick up an interchangeable lens camera, rather than a fixed lens camera, then the standard street photography focal lengths that work best for street photography are generally wide-angle lenses.
28mm, 35mm and 50mm lenses are all great starting points for the beginner street photographer. Generally, the wider the focal length, the closer you have to get to your subject. So 35mm and 50mm are generally easier to work with because you don't have to be so close to your subject. Wide-angle lenses are also quite lightweight depending on the brand, and how bright the lens is (lenses with the widest maximum Aperture of f /1.2 are usually heavier than lenses with a maximum Aperture that is slightly narrower, such as f /2).
Just be aware that on an APS-C camera such as a Fujifilm X100 V, the sensor size is smaller and therefore there is a crop factor of 1.62. So an 18mm focal length provides a 27mm range in 35mm full-frame. A 23mm lens is a 35mm equivalent focal length in full frame. A 35mm is equivalent to 53mm on a full frame sensor.
However, a four thirds sensor is even smaller and is equivalent to a 2.0 crop factor when compared to a 35 mm film. Therefore, a 14mm lens is equivalent to a 28mm lens on a full frame camera. A 17mm lens offers a 35mm equivalent focal length of 34mm. A 25mm lens offers the equivalent of a 50mm lens in a full frame sensor.
If you are going on the interchangeable lens route here are a few lightweight choices from different brands:
Sony FE 35mm f2.8 ZA Carl Zeiss Sonnar T* Lens
An extremely lightweight lens at only 119g with a bright Aperture of f /2.8 for Sony full frame cameras.
B&H Adorama Wex Park Cameras Amazon Amazon UK
Canon EF 50mm f1.8 STM Lens
Weighing only 159g, and with a very bright Aperture, this little lens is great for street photography for Canon DSLR cameras (Can be used on their R line of cameras with an adapter).
B&H Adorama Wex Park Cameras Amazon Amazon UK
Fujinon XF 56mm f/1.2 R
Street photography can be great fun using longer lenses. With a full frame equivalent of 85mm this 56mm lens is perfect for street photography from a distance. 405g
B&H Adorama Wex Park Cameras Amazon Amazon UK
Nikkor Z 35 mm f/1.8 S
Coming from their Z line of mirrorless cameras this lens 35mm is perfect for street photography. It weighs only 370g.
B&H Adorama Wex Park Cameras Amazon Amazon UK
Bag
The lighter the weight that you carry, the easier it will be when walking around the streets for hours on end. Therefore, a rucksack or a lightweight camera bag such as the Peak Design Everyday Sling or the Domke F-5XB Shoulder Bag will hold your camera, a lens, some batteries, your phone, a lens wipe, and maybe a portable battery charger.
Shoes
What you wear on your feet is just as important as the camera in your hands. If you've got the wrong shoes on there is no way you're going to be taking any photos all day long. So wear some trainers, sneakers, anything that you know is comfortable for your feet.
Business card
You want one of these because you might want to satisfy those inquiring minds. Somebody or photographing might want to know exactly what you're doing and there is nothing better than having a business card to keep them in check.

Night Street Photography
Interacting with People
You have to have a level of confidence when shooting on the streets. If you're getting close to people and taking their photos, there will most probably be somebody who doesn't like what you are doing. They may even say something negative to you. The best way to handle this is to be polite, maybe show them what you are doing or offer them your business card. Just keep a bright and breezy attitude with you at all times. The worst-case scenario is that you delete a candid photo if somebody really doesn't want you to have one of them. It's no big deal as you could be shooting all day long and have thousands of great photos to walk away with at the end of the day, so deleting one photo shouldn't be a problem.
Camera Mode Choices
P Mode
When you are learning how to do street photography you really want to concentrate on what's in front of you, rather than your camera settings. That's why the simplest choice when it comes to what camera mode to pick is Program mode. P mode on your camera dial gives the camera control of the Aperture and Shutter Speed whilst leaving you with control over the ISO. The camera chooses the Shutter Speed and the Aperture in accordance with your ISO choice in order to get a proper exposure. However, the beauty of the P mode is that you can override the settings - you can then quite easily change your Shutter Speed in order to capture somebody walking speedily along.
Shutter Priority
I personally would recommend this mode when starting out as it gives you a sense of how exposure works. You get to choose the Shutter Speed and the ISO, whilst the camera chooses the Aperture. Seeing as street photography is about focusing on action, choosing the Shutter Speed is ideal as you want to freeze your subjects in sharp detail. Imagine, for instance, that you want to photograph somebody walking past an advert on the wall, capturing them as they walked past a specific heading. You are on the other side of the street so your Aperture does not matter. However, you want to capture them as sharply as possible. You pick a Shutter Speed of 1/250 sec. It is a fairly bright day so you choose an ISO of 200. The camera picks the Aperture of f /11 in order to get that correct exposure.
Aperture Priority
This mode is great if you want to do street portraits. You can go ahead and pick the widest Aperture that your lens allows. You also pick your ISO. The camera then picks a fast enough Shutter Speed So that you can capture your subject in sharp detail.
Manual Mode
There's nothing wrong with jumping in at the deep end and taking full control of the camera. You choose the ISO, the Shutter Speed and the Aperture in order to get the correct exposure, depending upon the light conditions at hand. imagine that you want to capture a person on their bike - your settings are currently ISO 800, Shutter Speed 1/250sec, Aperture f /4. The sun suddenly comes out and you are overexposed. You quickly drop the ISO down to 400, darken the exposure slightly by increasing your Aperture to f /8, and in order to capture the bike, you increase your Shutter Speed to 1/400 sec.
Drive/Burst Mode
Street photography is all about capturing that decisive moment. Firing the shutter button when somebody walks into that pool of light, or when somebody is shouting at somebody else and they are creating a spectacular scene. Having that instinct, knowing when to click that shutter button takes practice. Therefore, when you are starting out it is much easier to take a series of shots with continuous shooting using Burst mode, rather than taking a single frame. Using burst mode you can select the best photo from a series of images which helps a lot when you are starting out. However, there is also something to be said for practising taking that single shot as you start your street photography career. Once you get good at it it becomes like muscle memory.
Auto ISO
Using Auto ISO makes the street photographer's life easier as you can set your ISO for a specific range, ie. 100 - 6400. Most cameras have this function so check your manual.
With Auto ISO The camera automatically selects the ISO within that range, so you don't have to worry about changing it. Not only that, you can set a minimum Shutter Speed of your choosing, such as 1/250 sec.
So imagine if you're in Aperture priority. You have set the Aperture and you are letting the camera choose the Shutter Speed. If the camera needs more light to make the exposure, instead of going below 1/250 sec, and possibly making your image blurry, the camera will instead raise your ISO from the base level of 100.
Auto ISO can be used in Program Mode, shutter priority, Aperture priority and manual Mode. For more detail on the benefits and the limitations of Auto ISO check out this article here.
Autofocus
Starting out with continuous Autofocus is great because you can simply rely on the camera to focus on your subject, whilst you look for subjects to shoot. Camera brands each have their distinctive modes for you to try out:
Canon: AI Servo + Manual or Automatic AF Point Selection
Nikon: AF-C + 3D Tracking
Fuji: AF-C + Wide/Tracking
Sony: AF-C + Tracking Focus Area
Ricoh Gr: Select AF
Panasonic: AF-C Tracking
Leica: AF-c
Zone Focus
On paper this sounds like an advanced technique, however, once you practise this you don't have to worry about focusing on the streets. Zone focusing takes away the focusing element of focusing.
For example, if I am shooting at f /8 and I want to focus on subjects that are three metres away, then everything from just under two metres to ten metres will be in focus.
Perfect for street photography, pick a wide-angle lens, either a 24mm, 28mm, or 35mm.
Put your camera in Manual Mode.
Choose a narrow Aperture of f/8 - f/16, depending on the light levels. (Shooting at a wide Aperture makes the focusing zone much smaller, therefore, much more difficult to focus accurately).
Pick a fast Shutter Speed in order to capture the action, i.e. 1/250 sec or faster and adjust your ISO accordingly to get a decent exposure.
Now you need to pre-focus your lens. If you are shooting street portraits then you don't want to focus too far ahead of you. However, if you like photographing people from a distance, then you might want to set your focus further away.
There are three methods that you can use to set the pre-focusing distance on your lens which I go into more detail in this article here on zone focusing.

Top dial: Aperture / Distance in feet & metres / Bottom: Zone focusing area with lines that delineate the zone that will be in focus
You can use the printed Aperture ring on your manual lens.
You can use a depth of field chart or calculator.
You can guess the distances and practise them so you know how far away you are focusing each time you go out. For the purposes of this article, go outside and practise focusing on objects at different feet/metres away at f /8, and take note of the distances. then when it is time to go out and shoot, focus on an object at a certain distance away that you know you enjoy and feel comfortable taking photos at, and you have already pre-focused your lens!

Depth of Field Calculator
Composition
Keep it simple...
Use the Rule of Thirds
Position your subject and/or subjects on one of the intersecting lines of the rule of thirds for a pleasing composition that allows your images to have a sense of balance.
Leading Lines
Elements that you include in your photos can sometimes be used as leading lines such as shop windows, pavements, street lamps and walls. These can be used to lead up to your main subject. Also, think about how shadows cast a line on the ground. Shadows from buildings, people, etc, can all be utilised in your images.

Leading Lines
Minimalism
Look for simple compositions, such as sunlit areas or shafts of light amongst the shadows, and wait for your subject to enter the lit area of the frame and Shoot in black and white for beautiful, startling contrast.
Use negative space where your subject is the only subject. i.e. someone walking past a uniform brick wall, or someone walking into a pool of light that completely covers the frame.
Look for streets that are virtually empty of passers-by and wait for the right person to enter the frame. This is a street photography technique called 'Fishing'.
Framing
Shoot someone through a bus window and keep the window in the image, around the edge of the frame.
Photograph someone in a park, perhaps shooting through the leaves of a tree or a bush.
A portico - imagine someone walking through a portico and you decide to frame the image having the portico as the frame around the edges.
Colour and Contrast
Look for people in clothes that have a singular colour, such as red, green, or any bold colour. Always look for compositions that include light. Where there is light there will be contrast. You can create contrast in your images with the right subject.

Colour
Editing
The most important aspect of editing street photography is to keep your images looking natural. HDR takes away the naturalness and so does increasing the Shadows slider and reducing Highlights to the maximum. (Doing that creates the HDR look). Be careful with adding too much Clarity and Detail Sliders too. I sometimes use negative Clarity for a softer, slightly ethereal vibe.
You can use Presets to apply a colour scheme, but too much Saturation always subtracts from the story you are telling and the content.
You want the viewer to think about your content and composition and not how beautifully saturated your photos are.
YouTubers to follow
I have learned most of my craft and have been greatly inspired by numerous Street Photography YouTubers.
In alphabetical order, here are a few YouTubers to follow for inspiration and tips:
Roman Fox
Fab tutorials on cameras and street photography and great POV comes from London based Roman Fox.
Pierre T Lambert
Chicago based Pierre T Lambert's channel features some truly inspirational POV videos that just make you want to go out and shoot.
Kyle McDougall
Urban and film photography inspiration in huge quantities coming to you from Kyle McDougall.
Evan Ranft
Evan Ranft is a street and urban photographer from Georgia, USA. His channel contains tutorials, inspiring images and business tips.
Serr
Beautiful, atmospheric and mesmerising night street photography and videos keep me coming back for more
Street Snappers
If you want to learn how to become a better street photographer then join Brian Lloyd Duckett's channel.
Samuel Streetlife
Japan and Germany's Samuel has some entertaining street photography POV videos. He loves street photography just as much as I do.
Sean Tucker
From philosophy to concepts to renowned street photographer features, Sean Tucker's channel is full of inspiration.
Optical Wander
Samuel Bassett's street photography is ace and you will learn loads when you watch him on his POV outings.
Faizal Westcott
Great Street photography POV, camera videos and more. Faizal Westcott takes a cerebral look at the art of Street Photography.
Conclusion
It really is a great time to become a street photographer. I hope that these tips, tricks and ideas are helpful and inspiring.
Go forth and create.