How To Choose The Best Metering Mode For Street Photography

Introduction
There are four different types of metering in digital photography. Evaluative (or Matrix), Centre Weighted, Spot Metering and Highlight Weighted. Each one of these can be used for photography. But how do you choose the right metering mode for street photography?
Let's get into it.
When I first started on my photography journey, I watched a couple of YouTube videos on metering, then set my camera to evaluative metering, (which measures the whole scene) and never thought about metering again, up until I became a street photographer. Now all I do is think about metering! Well, that's not exactly true, but I sometimes have to adjust my metering mode depending upon the subject that I am shooting on the streets and the light conditions that they are in.
What is Metering?
Every camera has a built-in light meter. The camera uses this light meter in order to get a correct exposure. It does this by measuring the reflected light - the shadows, the mid-tones, the highlights of a scene. Using one of the four different metering modes the camera will read and measure the light within the frame. When it measures the light, it will then adjust the aperture, the shutter speed, and the ISO (or one or two of each depending on which mode/priority you are in) and will expose correctly.
You can see the meter at work when you look through the viewfinder, or in many cameras today, when you look on the back of the LCD screen. It's the little bar usually in the centre of the screen at the bottom with a + and - sign at each end of a row of little vertical bars.
You can test this when you point your camera at a dark scene or a dark area -the indicator will go into the negative area of the meter. Conversely, if you point your camera at a very bright scene or area, the indicator will veer towards the plus sign. Ultimately, you want the meter to be in the centre The little 0 is where you want your exposure to be.
It doesn't matter whether you're in Manual Mode, Aperture Priority, or Shutter Priority, the camera will use either the Shutter Speed and/or the Aperture and also the ISO once it's read the light with the meter, in order to get that exposure correct.
Metering situations
When a scene is evenly lit and you are looking through the viewfinder, then the camera's meter has an easy time measuring the light for the exposure; this is because the light is even and there are no contrasts. However, when there are strong contrasts within a scene the camera's meter can have a problem measuring the light effectively.
Imagine photographing a person, wearing brown clothes, walking past a brick wall on a grey day - the camera's meter will have no problem measuring the light for this scene as it is all pretty uniform. You would use Evaluative Metering Mode in this scenario.
Now consider a scene where somebody is walking down a dark tunnel, but because there is a hole in the centre of the roof of this tunnel there is a shaft of light shining down across the wall and onto the ground. You want to capture the person walking through that shaft of light. However, the camera's meter might bring down the brightness on that shaft of light in order to match the exposure of the dark areas of the tunnel. Yet, you wanted that shaft of light and the subject exposed correctly. This is where a different meeting mode will come in handy.
Finally, imagine photographing somebody walking towards you, about two meters away, and he or she is wearing black, with the sun and bright clouds behind them. Using Evaluative Metering the camera's meter will try to expose the scene across the entire frame and in doing so will try to expose the person walking towards you correctly. Depending upon the metering mode that you use and how bright the sky and the clouds are, it may overexpose the area behind the subject or it may just get the exposure correct, or it may underexpose the subject. This is another instance where different metering modes come in handy.
Metering modes allow you to select certain portions of the frame and expose for those areas so that you get a correct exposure for your subject.

Great for an even light scenario. Evaluative Metering Mode covers the entire frame
What is Evaluative / Matrix Metering Mode?
The granddaddy of them all, Evaluative Metering Mode is the mode that gets used most of the time. This mode takes a reading across the entire frame, splitting individual portions of the frame into zones, which are then read for the shadows, mid-tones and highlights. One thing to be noted - where you position your focus point is important in the equation, as your camera's meter will make that area more important than the other zones in determining the correct exposure.
Evaluative Metering Mode for Street Photography
This is my personal best mode for street photography, as I use it most of the time. It is perfect for grey days when everything is evenly lit. It is also great when you're photographing people walking down the street, past windows, past billboards past street lamps. In practice, it is pretty good for the majority of situations, except when they are extreme contrast of light and dark. In these instances, Evaluative Metering Mode can struggle slightly and it may be best to use one of the metering modes I will be discussing next.

Center Weighted Metering Mode - The centre of the image is exposed correctly
What is Centre-Weighted Metering Mode?
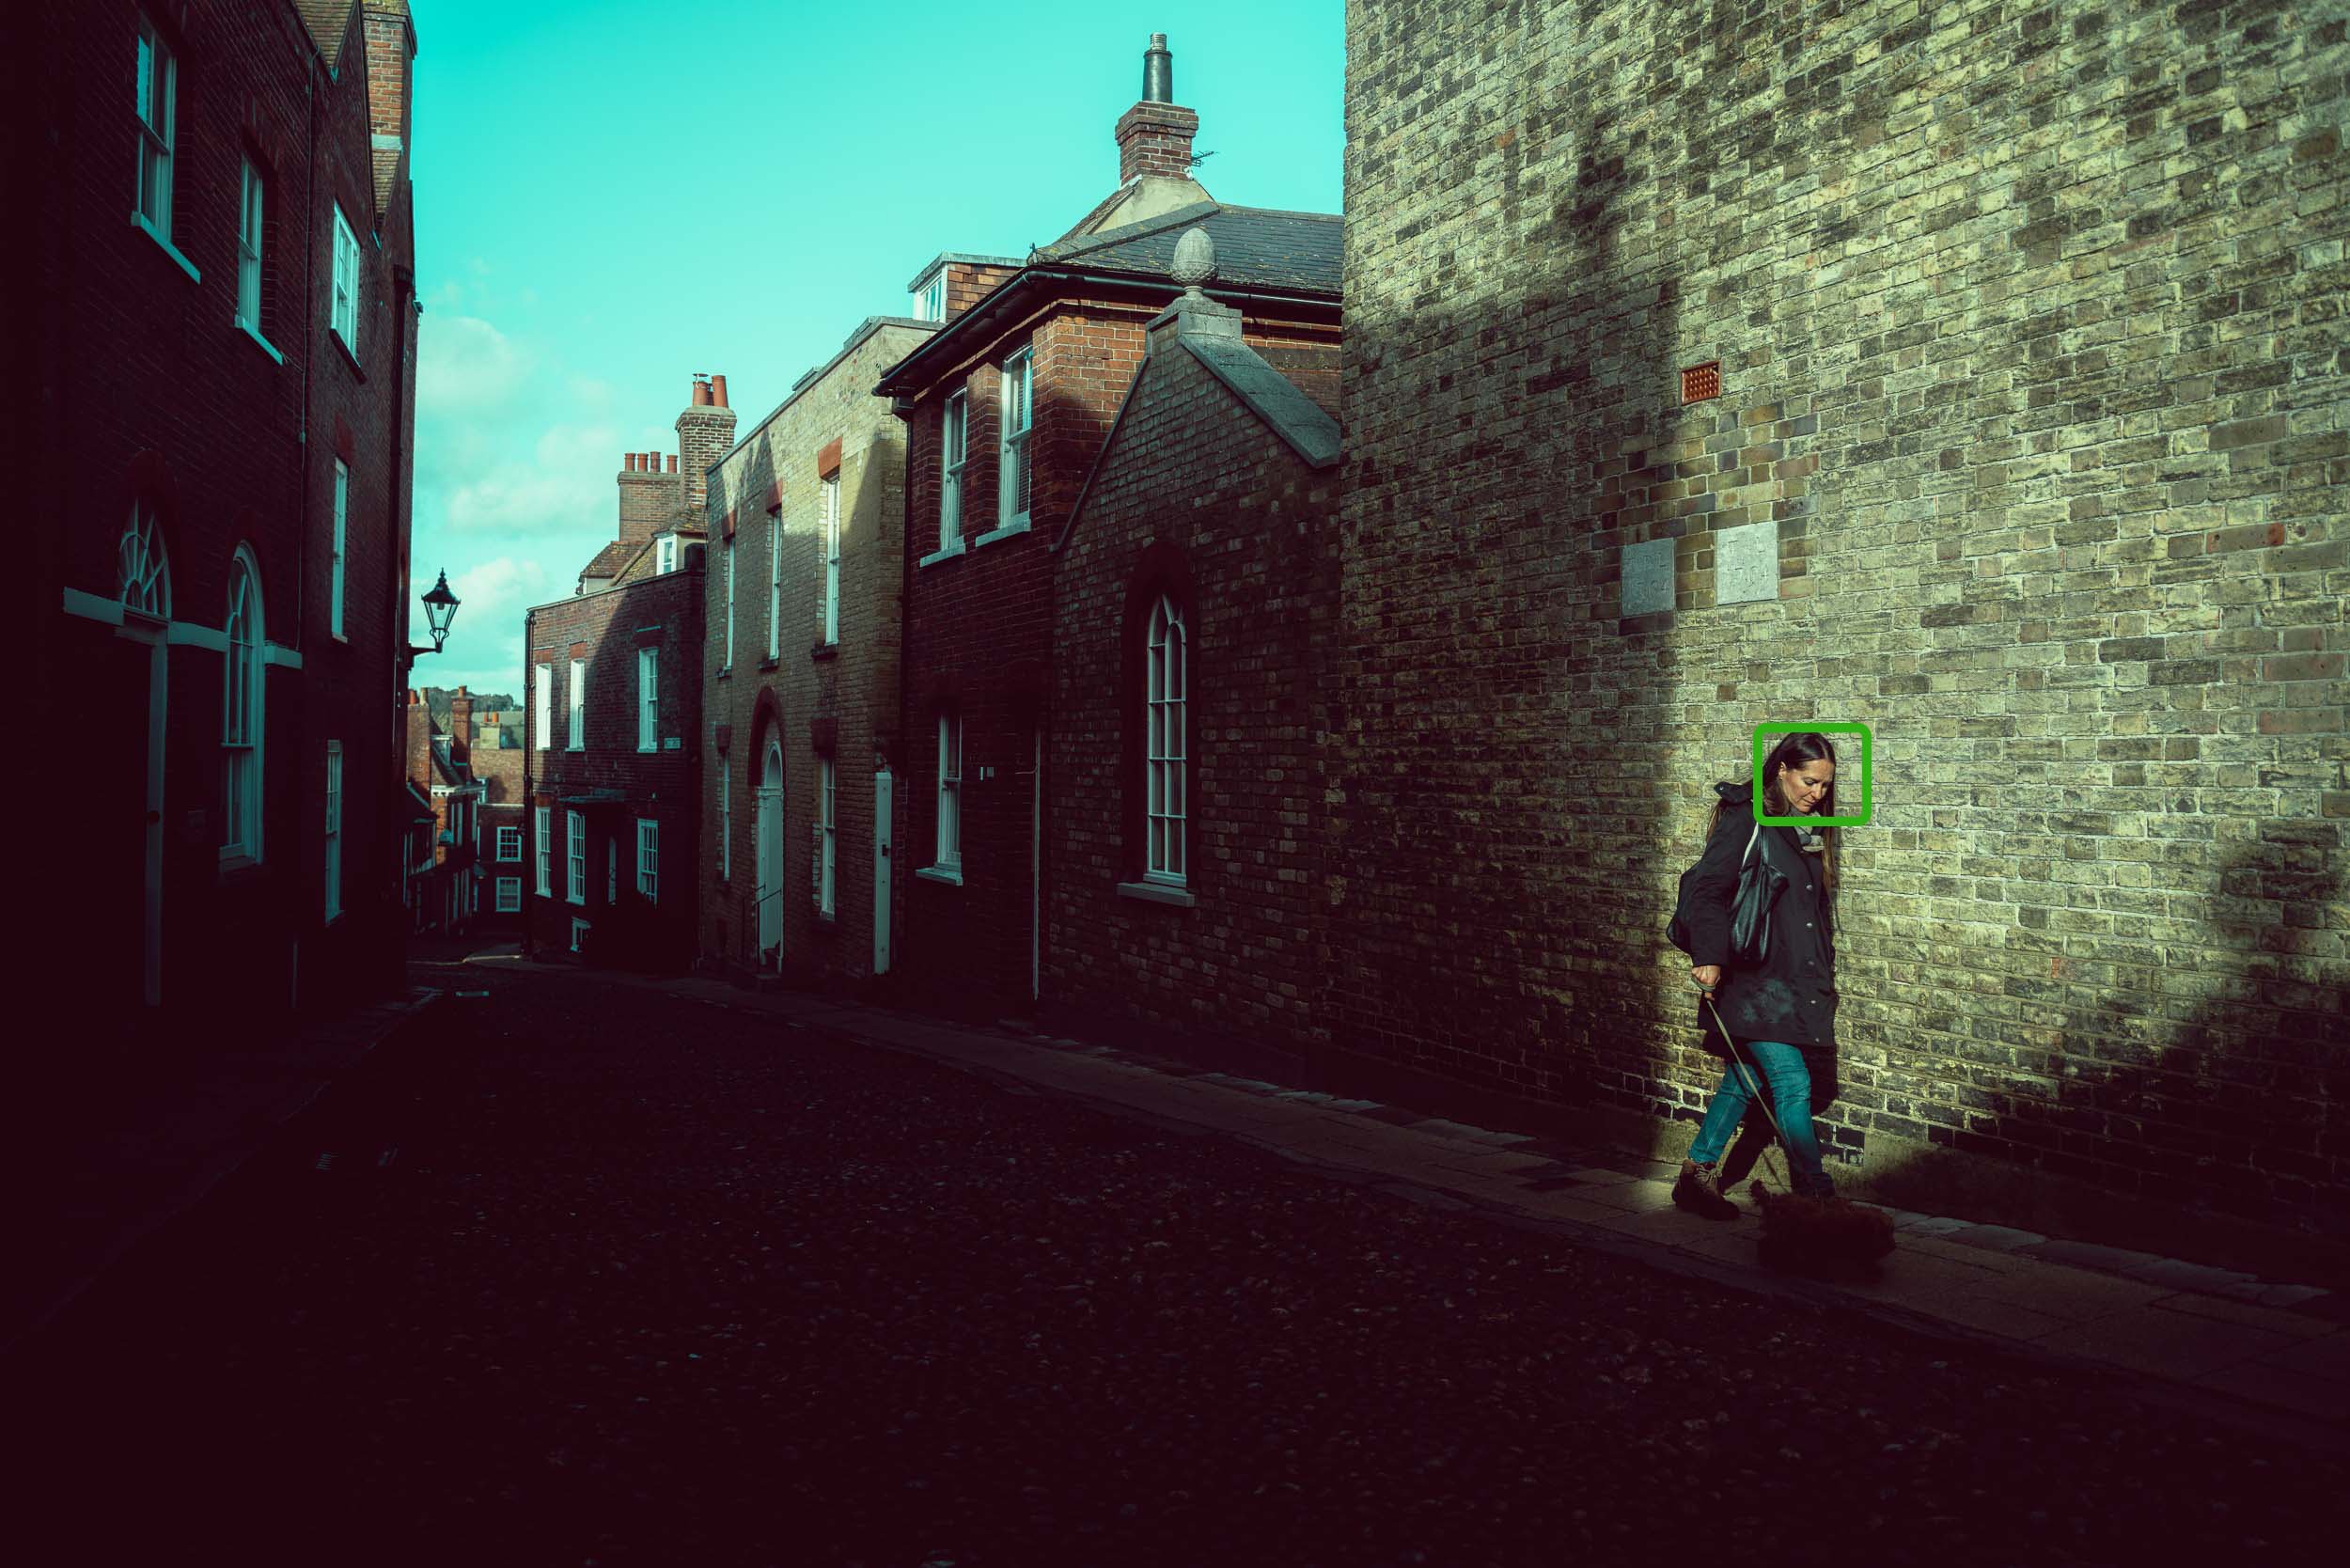
It's quite simple. Centre-Weighted Metering Mode takes a reading from the centre portion of the frame only, ignoring the corners, the areas around the centre portion. Because it takes a reading from the centre portion of the frame, it does not use the focus point that you are selecting. It simply takes a reading from the centre. Depending upon camera manufacturers it may take a reading from 60% to 80% of the frame. It is great for street portraits, or when something is taking up a large portion of the frame in the centre and you really want to get it exposed correctly.
Centre Weighted Metering Mode for Street Photography
Remember the example where somebody is walking towards you, about two meters away, and he or she is wearing black, with the sun and bright clouds behind them?
If you want to make sure that the person is exposed properly then you want to use the Centre Weighted Metering Mode for this task. It will expose correctly for the subject, ignoring the sun, the clouds and anything else around the frame. Therefore, it can overexpose whatever's behind the subject in this instance.
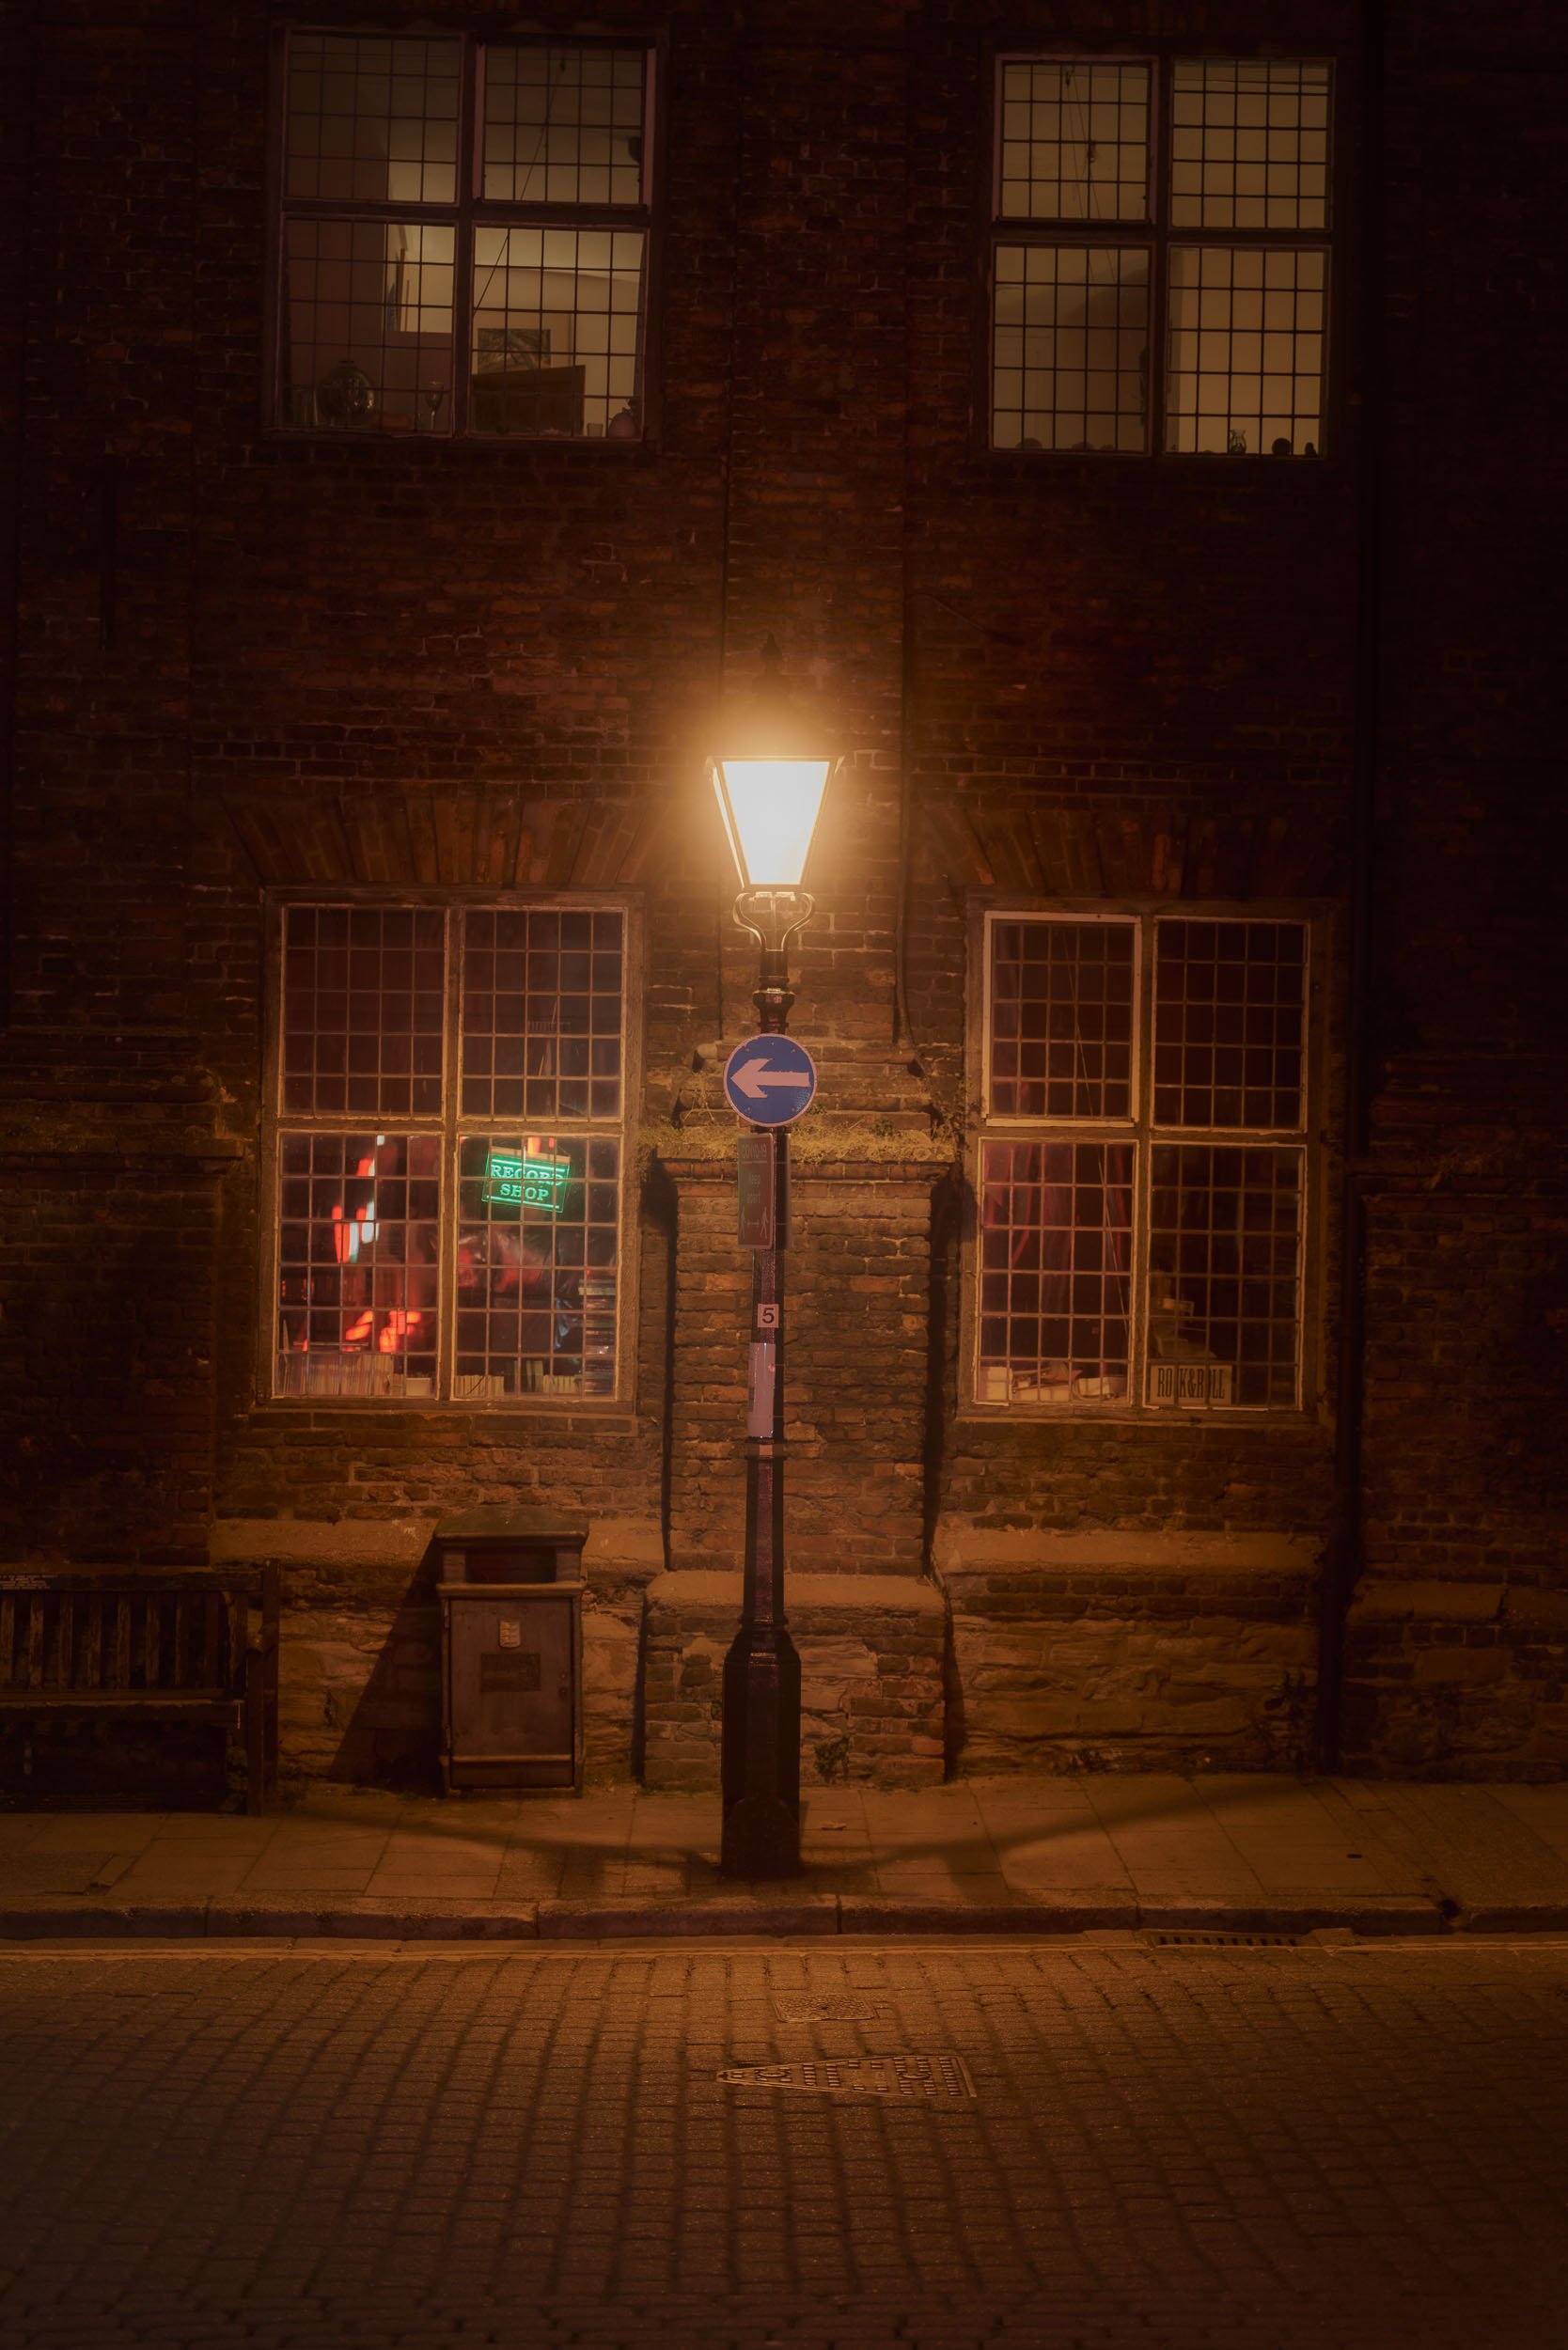
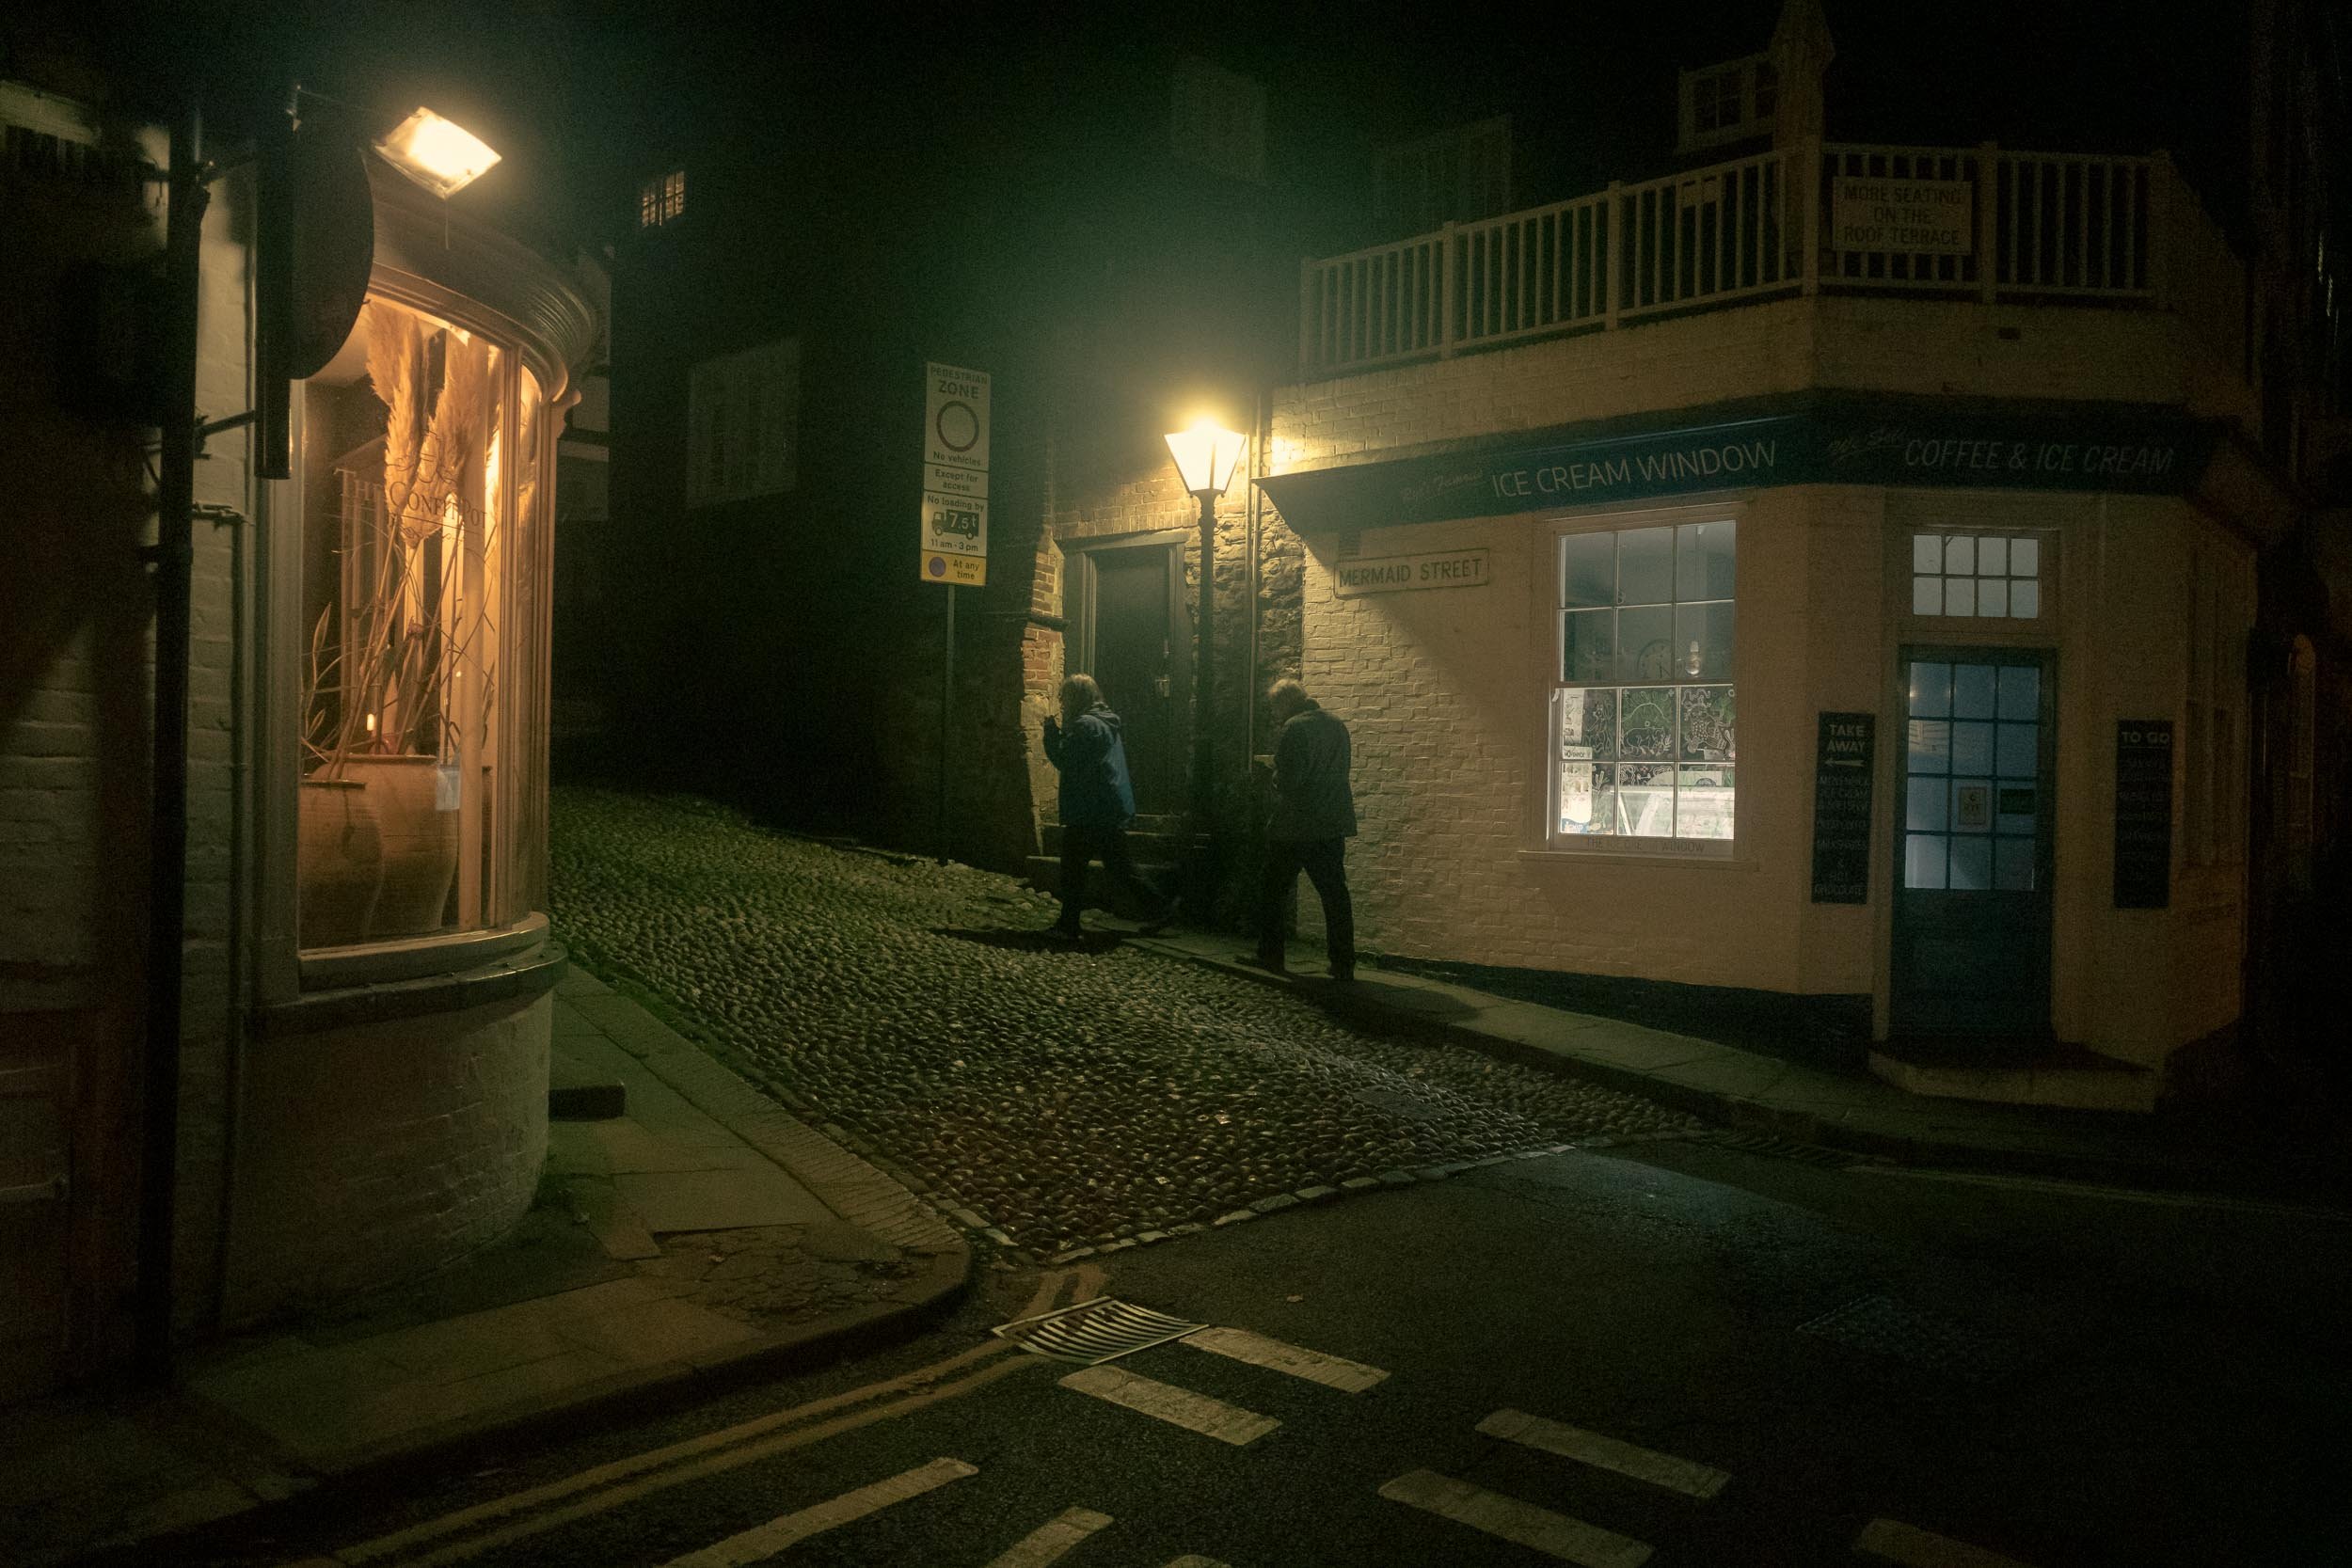
Conversely, for night street photography, you may want your subject, who is in the centre of the frame, exposed properly (such as a lit-up window display), whilst you may want everything around the subject to fall into shadow. If you used Evaluative Metering Mode, it may bring up the brightness on the shadowy areas around the subject, whereas Centre Weighted Metering Mode is perfect for this situation as it will allow the shadowy areas to fall into darkness.
Another example where Centre Weighted Metering comes in handy is when your subject is walking in the sunlight, towards you in the centre of the frame, and they are wearing white, and you are using a wide Aperture because your focus is on the subject only. However, because of their clothes, you know that they will be overexposed if you used Evaluative Metering. Simply use Centre Weighted Metering to get the camera to read the light in the centre of the frame and expose the subject properly, whilst the metering ignores the corners of the frame.

Only a small focus area is metered with Spot Metering Mode
What is Spot Metering Mode?
Spot Metering mode read the light from your focus point and nothing else. It literally is just a single cell or area from 1% to 5%. You can use Exposure Lock, (AEL) when you use this mode so that you can focus on the area that you desire, lock the exposure, and then recompose your image.
Spot Metering Mode is great when somebody or something takes up a small portion of the frame.
Spot Metering Mode for Street Photography
You may want to use Spot Metering Mode when you see that person walking down that dark tunnel with the shaft of light coming down from the hole in the roof. Simply move the focusing point on the shaft of light. This way the camera ignores the shadowy areas around the subject and it properly exposes for the shaft of light and that person you're waiting (fishing for) to enter the frame.
You can also use Spot Metering if you are photographing somebody walking down a street when it is a snowy day. If you are using Evaluative Metering mode the camera might try to underexpose the snow. However, using Spot Metering on the subject as they walk will cause the camera's light meter to ignore the snow, thus ensuring correct exposure for your subject and keeping the whiteness of the snow a bright white.
Finally, if you're shooting street portraits and your subject is wearing dark clothes and it is a dark, dismal day, they are standing in front of a dark background, or night is drawing in, you will want to get their skin exposed correctly and not underexposed; then Spot Metering is a great tool when focusing on the subject's face to ensure correct exposure of the subject.

Highlight Metering Mode - The highlights are exposed correctly
What is Highlight Weighted Metering Mode?
If you shoot a lot of night street photography like myself, then you must be aware of the delicate balancing act of getting street lights correctly exposed and not blown out. Thankfully, there is a common cure for this ailment and it is called Highlight Weighted metering mode.
This metering mode basically ensures that the highlights are properly exposed and not blown out, which means that every single light should be exposed properly. However, it does mean that shadows can be very dark and this can cause a problem at night when the rest of the scene is very dark and the only lights are street lights. Therefore, this mode is best used when you know that your camera has good Dynamic Range and can bring back much of the detail in the shadows when you are shooting RAW.
Note - not all cameras have this metering mode, but many of them do. Check your camera to see if you have Highlight Weighted metering mode.
Highlight Weighted Metering Mode for Street Photography
I would not recommend this mode when it is really dark, after sunset. However, during sunset when the councils turn the street lights on and there is still a fair amount of ambient light, then this mode can work really well as you do not have to worry about overexposing any lights.
This mode can also work really well for street portraits, especially on a bright sunny day, and your subject is wearing bright clothing or jewellery that is made all the more bright by the sunlight. These highlights can easily be overexposed when using Evaluative Metering Mode. But you can simply set your metering mode to Highlight Weighted Metering Mode and let the camera expose for those highlights.
Highlight Weighted Metering Mode can also work well when you are shooting a subject, or subjects, walking down a street with the sun behind them. if you take a meter reading simply for the subjects, then you will most likely blow out some of the sky and the sun. However, Highlight Weighted Metering Mode will save the sky, possibly ensuring that brilliant sunset exposes correctly and then you can bring up the shadows on your subjects and the street in post processing.
Conclusion
So what actually is the best metering mode for street photography? It really does seems like all of these modes have their own uses depending upon the situation and the lighting scenarios. One thing to note is that these are all tools to be used to help improve your photography.
Go forth and create.