5 Simple Tips That Will Improve Your Night Street Photography
Welcome to an in-depth journey into the world of night street photography.
In this post, I'm gonna present you five easy tips that you can learn to up your night Street photography game.
In my quest to become a better night Street Photographer, I have constantly worked to refine a bunch of techniques that have not only enhanced my skill set but also made my photography much easier, both during the day and at night.
Now I want to share these simple beginner tips with you, thereby in the hope that they will elevate your night street photography to exciting new levels. Let’s get into it.

Mastery of Nightlights
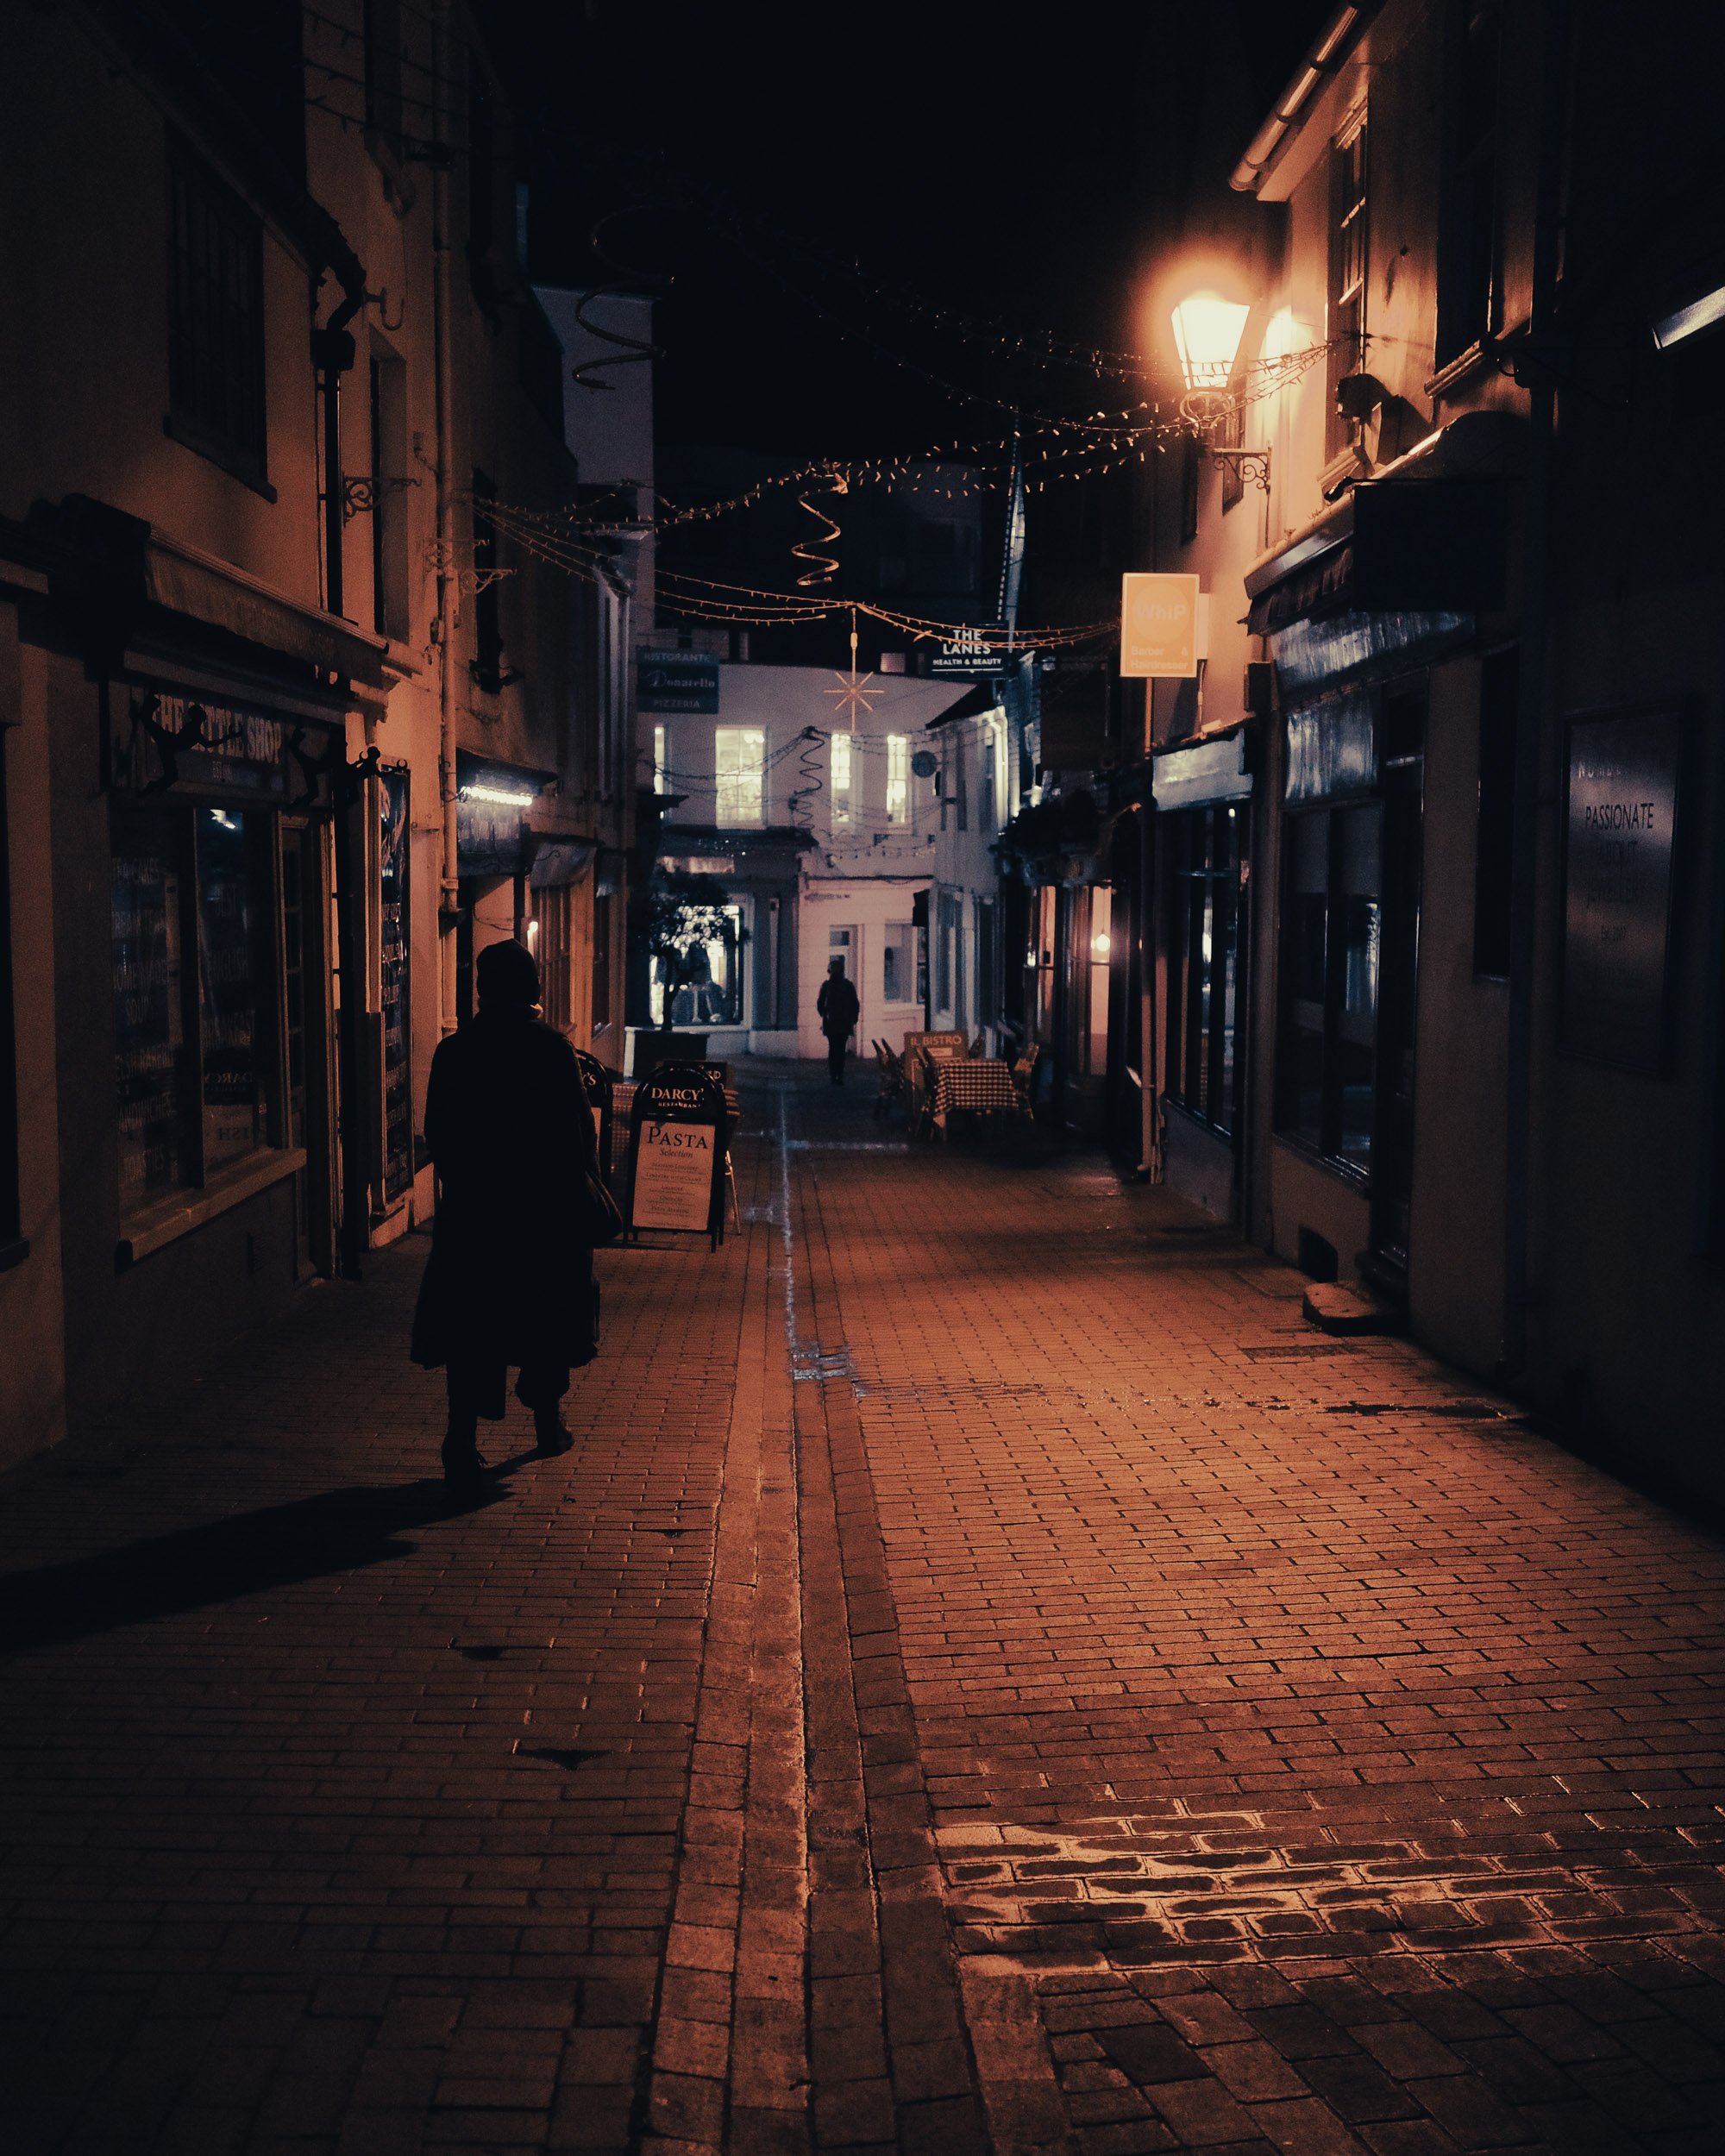
Night light represents the core of night Street photography.
Streetlights, neon signs, and even the soft glow from shop windows is everything that a Street Photographer needs, as without them you simply have darkness.
Strategic Use of Streetlights
The key is to use these lights to your advantage. It couldn't be more simple..
Make sure that the street lamp is in your composition - in your frame, and wait for a passerby to enter this natural spotlight. Capture people engaged in nightly routines, such as checking their phones, having a smoke, and chatting away, under the soft glow of a street or shop lamp.
Take note of the contrast between the lit subject and the surrounding darkness as it can create an evocative, moody image.
Balancing Light and Dark
Handling the exposure of man-made lights can be tricky. In Aperture Priority mode, you may need to utilise Exposure Compensation to avoid blowing out the highlights. If you’re in Manual mode, adjust your aperture to slightly underexpose the shot, ensuring the highlights aren't lost. This technique preserves detail in the light. if need be, you can boost the shadows during post-processing.
Colourful Night Scenes:
Neon and shop lights can be a goldmine for atmospheric shots. These sources often emit vivid coloured lights that can transform an ordinary scene into something surreal and extraordinary. Also pay attention to how these coloured lights interact with different textures and surfaces, adding depth and a layer of intrigue to your compositions.

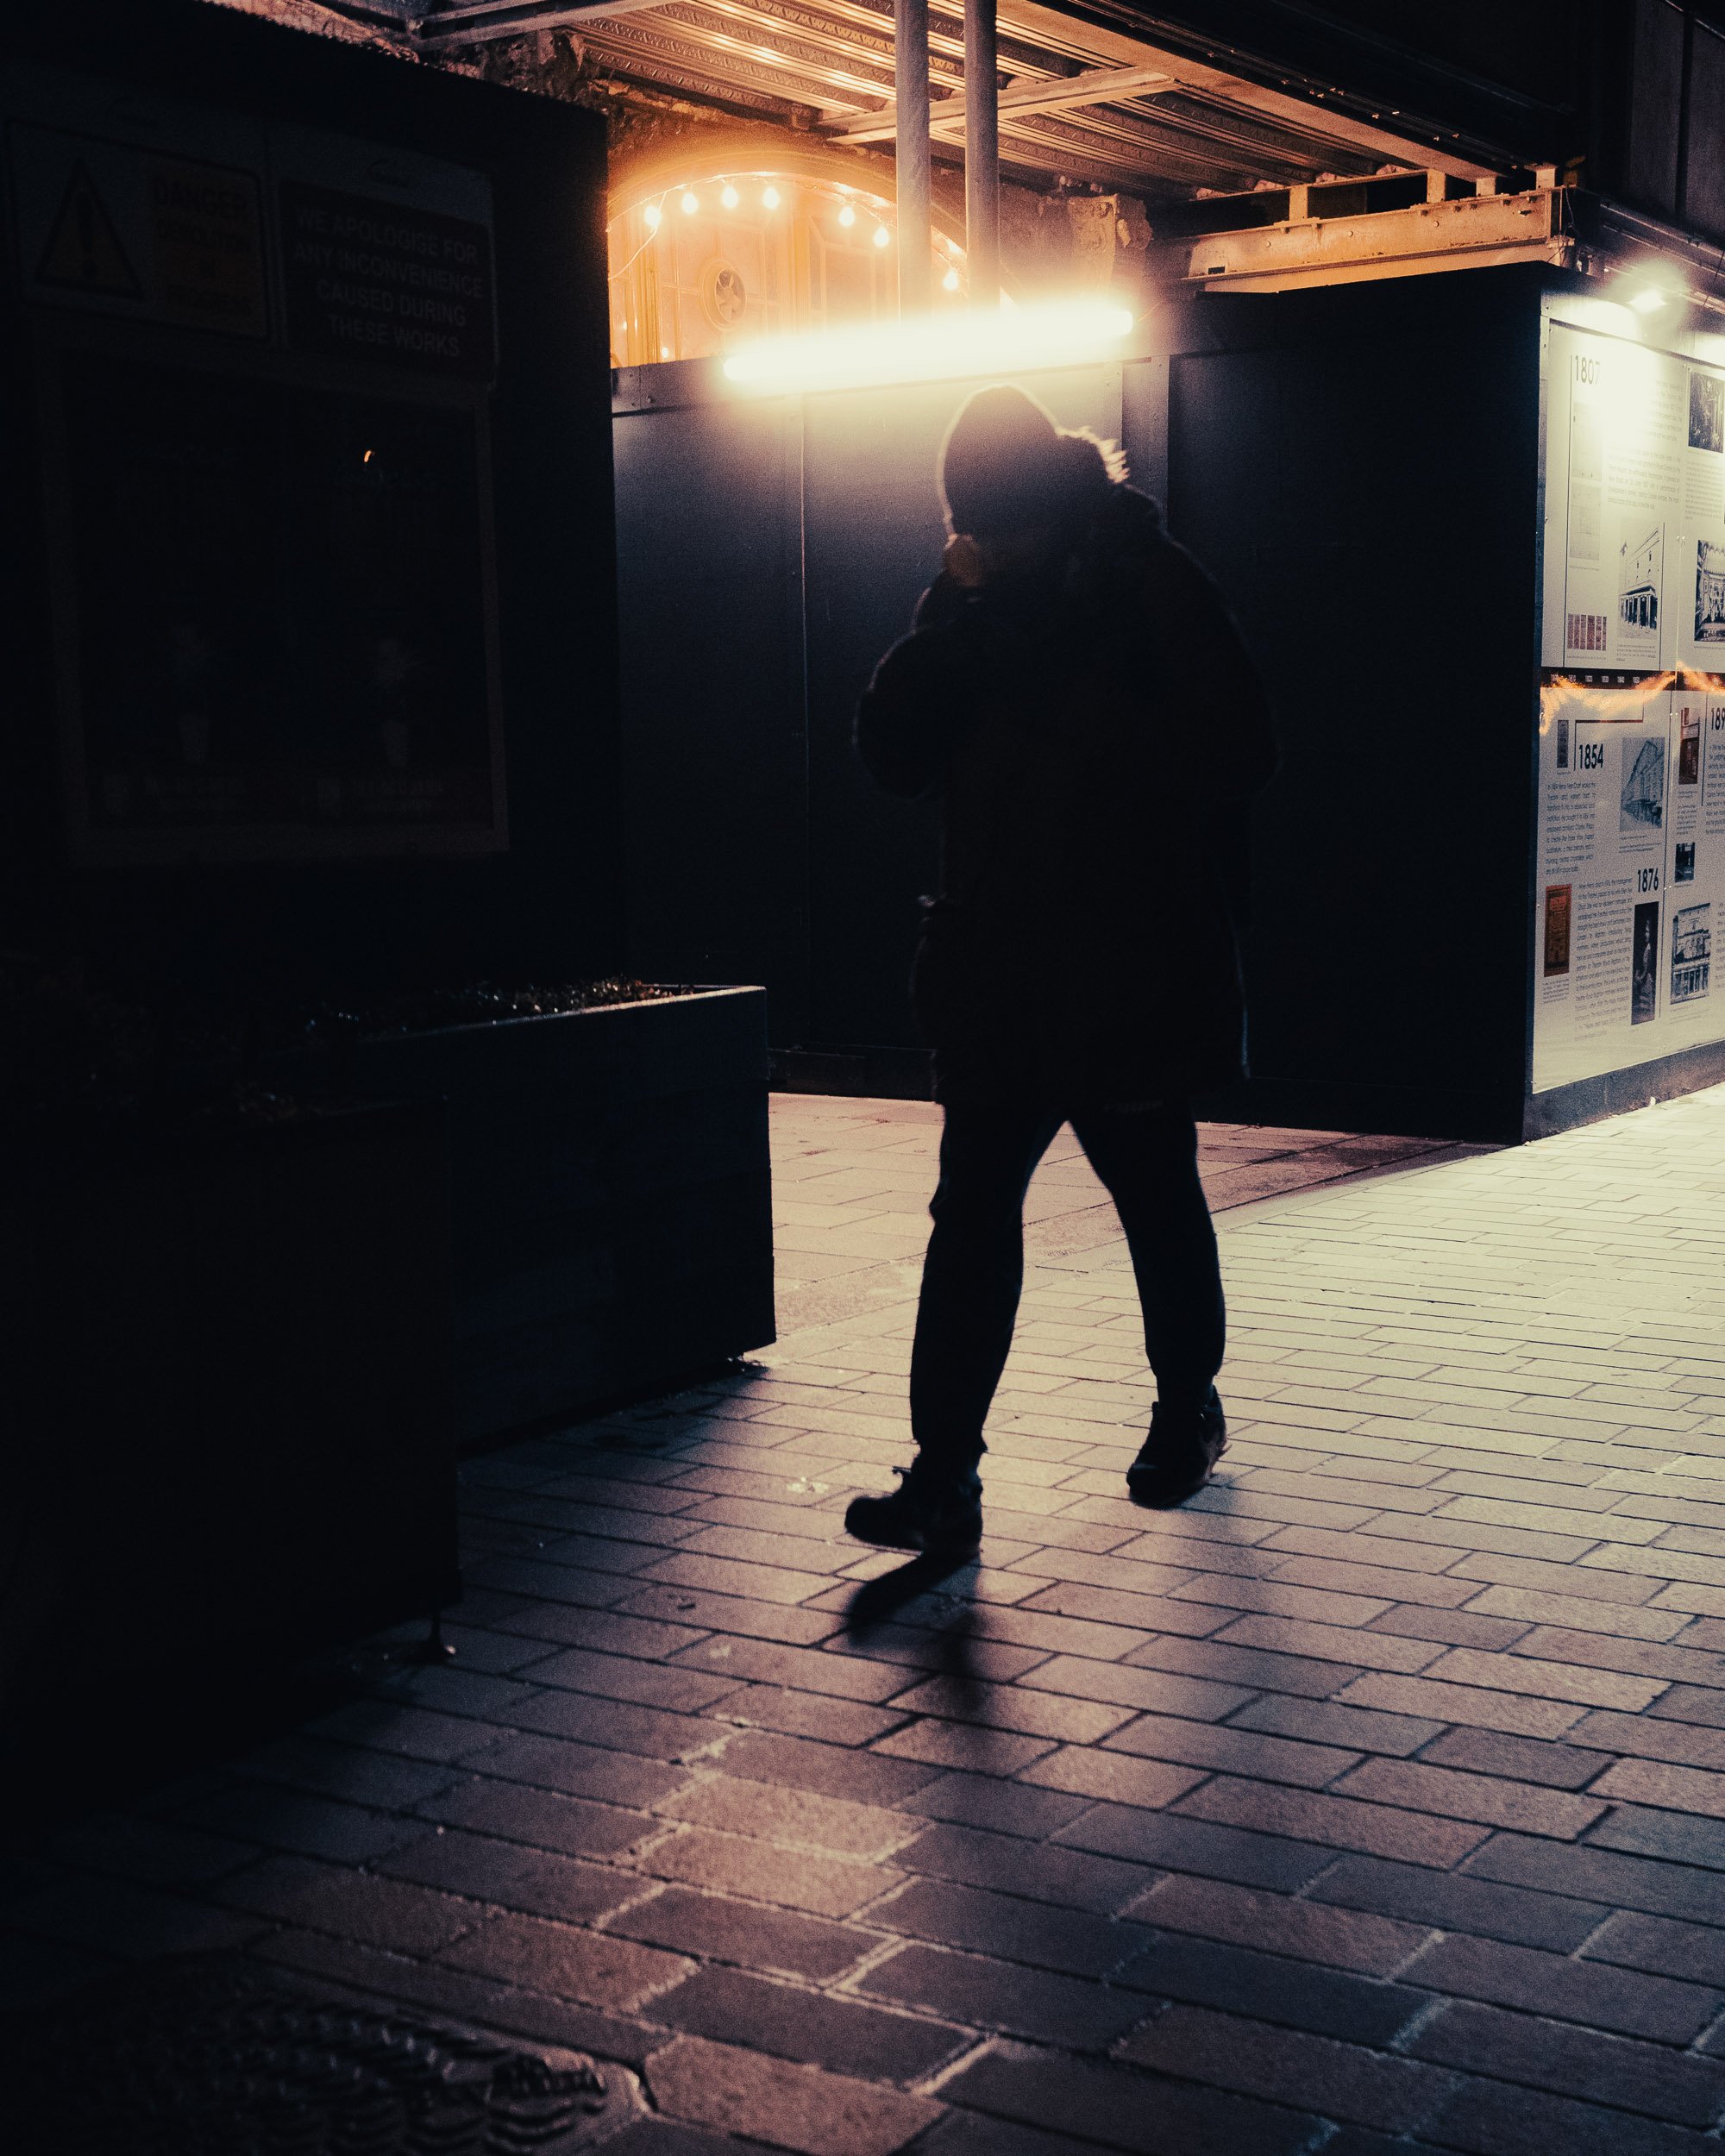
2. The 'Fishing' Technique
This method, inspired by the legendary Henri Cartier Bresson, is all about patience and waiting for that decisive moment, in which you take the shot:
Patience as a Virtue
The essence of 'fishing' lies in waiting for the perfect moment. Simply set your frame and wait for the right subject to walk into it. The technique requires patience, but the payoff can be a once-in-a-lifetime shot,
Overcoming Physical Challenges
As a photographer with physical limitations in my arms and hands, I can attest that if I can achieve success with this technique, it’s accessible to everyone. It’s about finding the right spot and letting the scene unfold naturally.
3. Noise: The Night Photographer’s Companion
Noise in photography is often seen as a drawback, but in the dark and shadowy streets, in my humble opinion it can add character and subtle texture
ISO: A Delicate Balance
Night photography often requires higher ISO settings, I personally use a range from 800 to 6400.
The key is balancing ISO with aperture settings to maintain exposure that lets you capture the mood of the night.
Modern Cameras and Noise
With advancements in camera technology, high ISO noise is less of a concern. In fact, a bit of noise can add an authentic, gritty feel to street photos.
If necessary, post-processing software can be used to reduce noise, though , I personally feel that, often leaving it untouched adds to the atmosphere of the image.

4. Composition: The Core of Visual Storytelling
Composition in photography isn’t just about framing; it's about telling a story through your lens
Leading Lines and Depth
In my photography I always like using leading lines. I love the curvature of the roads and the obliqueness of the alleyways, and I often put them into my night Street photography images.
Utilize the urban landscape to create leading lines.
These can be roads, pathways, or even light trails, which guide the viewer’s eye and create a sense of depth.
Foreground Elements for Depth
Though not always apparent on the streets and not always available try to incorporate foreground elements like walls, street signs, that can work too add layers to your images, making them more dynamic and interesting. These elements should always complement, and not obstruct, your main subject.

5. Thoughtful Editing: Enhancing Night Scenes
Editing is the obvious final, critical step in the process of night street photography:
Subtle Enhancements:
I always aim for minimal but effective adjustments. this means that might add a preset and then do a simple play around with shadows and highlights to bring out details without losing the essence of the night.
From my personal editing I like to steer clear of heavy-handed HDR techniques. These days I like to apply a natural look that represents the scene as I experienced it but also adds a distinctive vibe to make the photo atmospheric.
Bonus Tip: The Magic of Pro Mist Filters
A pro mist filter can elevate your night photography, adding an ethereal quality to light sources. I am always using them and I think if you love my street photography then you should too.
Enhancing Atmospheric Lighting
The Pro Mist creates a halo effect around lights, adding a dreamlike quality to your images.
It's not just about aesthetics; it also helps in managing tricky highlights in night scenes, and I really need to do any under exposing any more because the Pro Mist filter helps me work more efficiently and atmospherically!
Conclusion
Armed with these tips and techniques, I am hoping that you can go out there and explore the enchanting world of night street photography with confidence and determination. Remember, the journey is as important as the destination and don't forget to wear decent shoes!
Go forth and create.