13 Tips for Shooting Urban Landscape Photography at Night

Strand Nights
Introduction
There are many genres of Street Photography.
Urban Landscape Photography is one of the most interesting because it forces you to slow down and think about your composition, as opposed to quickly snapping that decisive moment when someone walks into frame.
So what exactly is Urban Street Photography? And what practices can you utilise in your night street photography to get great urban landscape shots?
Let's get into it.
What is Urban Landscape Photography?
When I am out in my wellies, traversing the East Sussex fields, with camera in hand, looking for that next great landscape capture, I will employ a number of compositional elements to create a decent image.
The wide-angle lens used in this image causes perspective distortion, where the foreground looks larger in size because the lens is so close to the foreground object. This is also exaggerated by having the camera (on the tripod) close to the ground.

Autumn Colours - Shot at 35mm
I might also use Leading Lines - I have positioned the groove in the grass so that they both run from the bottom of the frame and lead down to the subject, which ultimately draws the viewer's eye into the scene.

Valley Route
'Where are you going with this?' you might be thinking...
Well, if you take these landscape photography composition rules and apply them to your street photography, you will be creating urban landscape images.
Cityscapes, towns - photographing them from a distance, or shooting a street from a perspective where you are emphasising the road's depth with leading lines. Also shooting a busy road from a high or low angle. Even a busy city street at night, where the photographer focuses on the colours emitting from the car headlights and the street lamps can all be considered urban landscape photography.
As landscape photographers document the countryside, deserts, waterfalls and beaches; the urban landscape photographer documents, cities, towns and their man-made structures, in the day or at nighttime.
Use a Tripod
I know that I cannot handhold a camera in the dark. Everything I shoot comes looks blurry, even with IBIS turned on.
At night you need light to get a decent exposure therefore you need to shoot at a wide apertture.
You can raise up your ISO - but increasing it too much will result in grainy images.
Or you can use a slow Shutter Speed. But keeping it too slow will result in motion blur and, especially at night, you won't get sharp images if you hold the camera.
Using a tripod negates these issues.
You can shoot at ISO 100, for the cleanest image.
To use a low ISO, you will also need to use a slow Shutter Speed. You can shoot speeds up to 30 sec or longer, providing you are prepared to wait for the duration.
You can also use an aperture from approximately f / 2.8 - f / 8, (depending on the conditions) and get a sharp focus on the scene.
How to focus
When I am shooting Urban Landscapes at night, I use Single Shot Autofocus with Back Button Focus, as this allows the Camera to lock-in that in that focus before I click the shutter button.
Back Button focus takes away the double use of the Shutter button and allows you to consign focusing to a separate, programmable button.
With this method 99% of my shots are keepers. Beforehand, approximately 75% of my shots were sharp.
Manual focusing is also an option if you know that you have the time to focus and use focus magnification to get your subject sharp, together with Live View and focus peaking. If I want to get the sharpness across the scene I will focus 1/3 of the way into the scene, from the bottom.
Manual or Aperture Priority?
When I am out in the field I start by selecting my aperture. I like to make those street lights glow so I may pick an f-stop around f / 5.6. I am already on a tripod so I then make sure that, depending upon the light conditions, my ISO is in the range of 100 - 400. Lastly, I tweak the Shutter Speed to get a correct exposure. If there are people in my urban environment shot then I will increase my ISO up to 6400 and, in turn, increase my Shutter Speed from approximately 1/160 sec or faster. This is why I use Manual Mode for Urban landscapes. I personally like to have full control as I know I will get that Exposure correct. However, Aperture Priority and even Shutter Priority will work in most cases, but if you have the time to set up the shot you have the opportunity to get the Exposure exactly how you want it . Manual Mode gives you that kind of control.

Night Light
What Aperture to use
I can get sharp focus on my subjects at wide apertures because I am usually far away from my subjects. Therefore, the closer I get the thinner the plane of focus will be. Focus depends on how far away the subject is from the sensor of the camera. From personal experience, when shooting a street and I want to get a sharp depth of field then shoot from f / 2.8 or narrower, depending on how much ambient light there is.
Don't Touch That Shutter Button
If you have the camera on a tripod and you are shooting Urban night images on a tripod at low ISOs and long Shutter Speeds then you don't want to increase the chances of camera shake, therefore you will want to use the built-in timer option or use an external Shutter remote. I personally use a wireless Shutter Remote which also has extra programmable buttons so that I can focus and shoot without touching the camera.
Lenses
I currently use an 18-75mm lens when I am shooting Urban night shots as I can fine-tune the composition to my liking. However, any wide-angle prime lens will work providing you are prepared to move, in order to get the framing you need. A zoom lens is very useful if you wish to focus on details.
About Perspectives
With this image, I utilised what I had learned from my landscape photography outings. I am using the road as a leading line to lead up to the subject (the castle). I used a wide-angle to emphasise the detail in the road and to accentuate the cobbles in the foreground.

Night Castle
I have shot this image from the ground, so that the entire road’s cobbles are accentuated.

The Other Side of Church Square - 44mm
I haven't done any myself, as of yet, but shooting from a high angle makes for some beautifully expansive urban landscape photography at night.
Weather Conditions
I'm not one to shoot in the pouring rain, however, the rain offers some exceptional reflections. Rain is particularly great for night street photography as this style of photography is all about the lights from street lights, shop windows and car lights. These man-made wonders all create beautiful reflections that only add to your images.
Shooting during wintery, colder temperatures, in the early mornings or at night raises the possibility of capturing some atmospheric mist in your photos too.
Leading Lines
Examples:
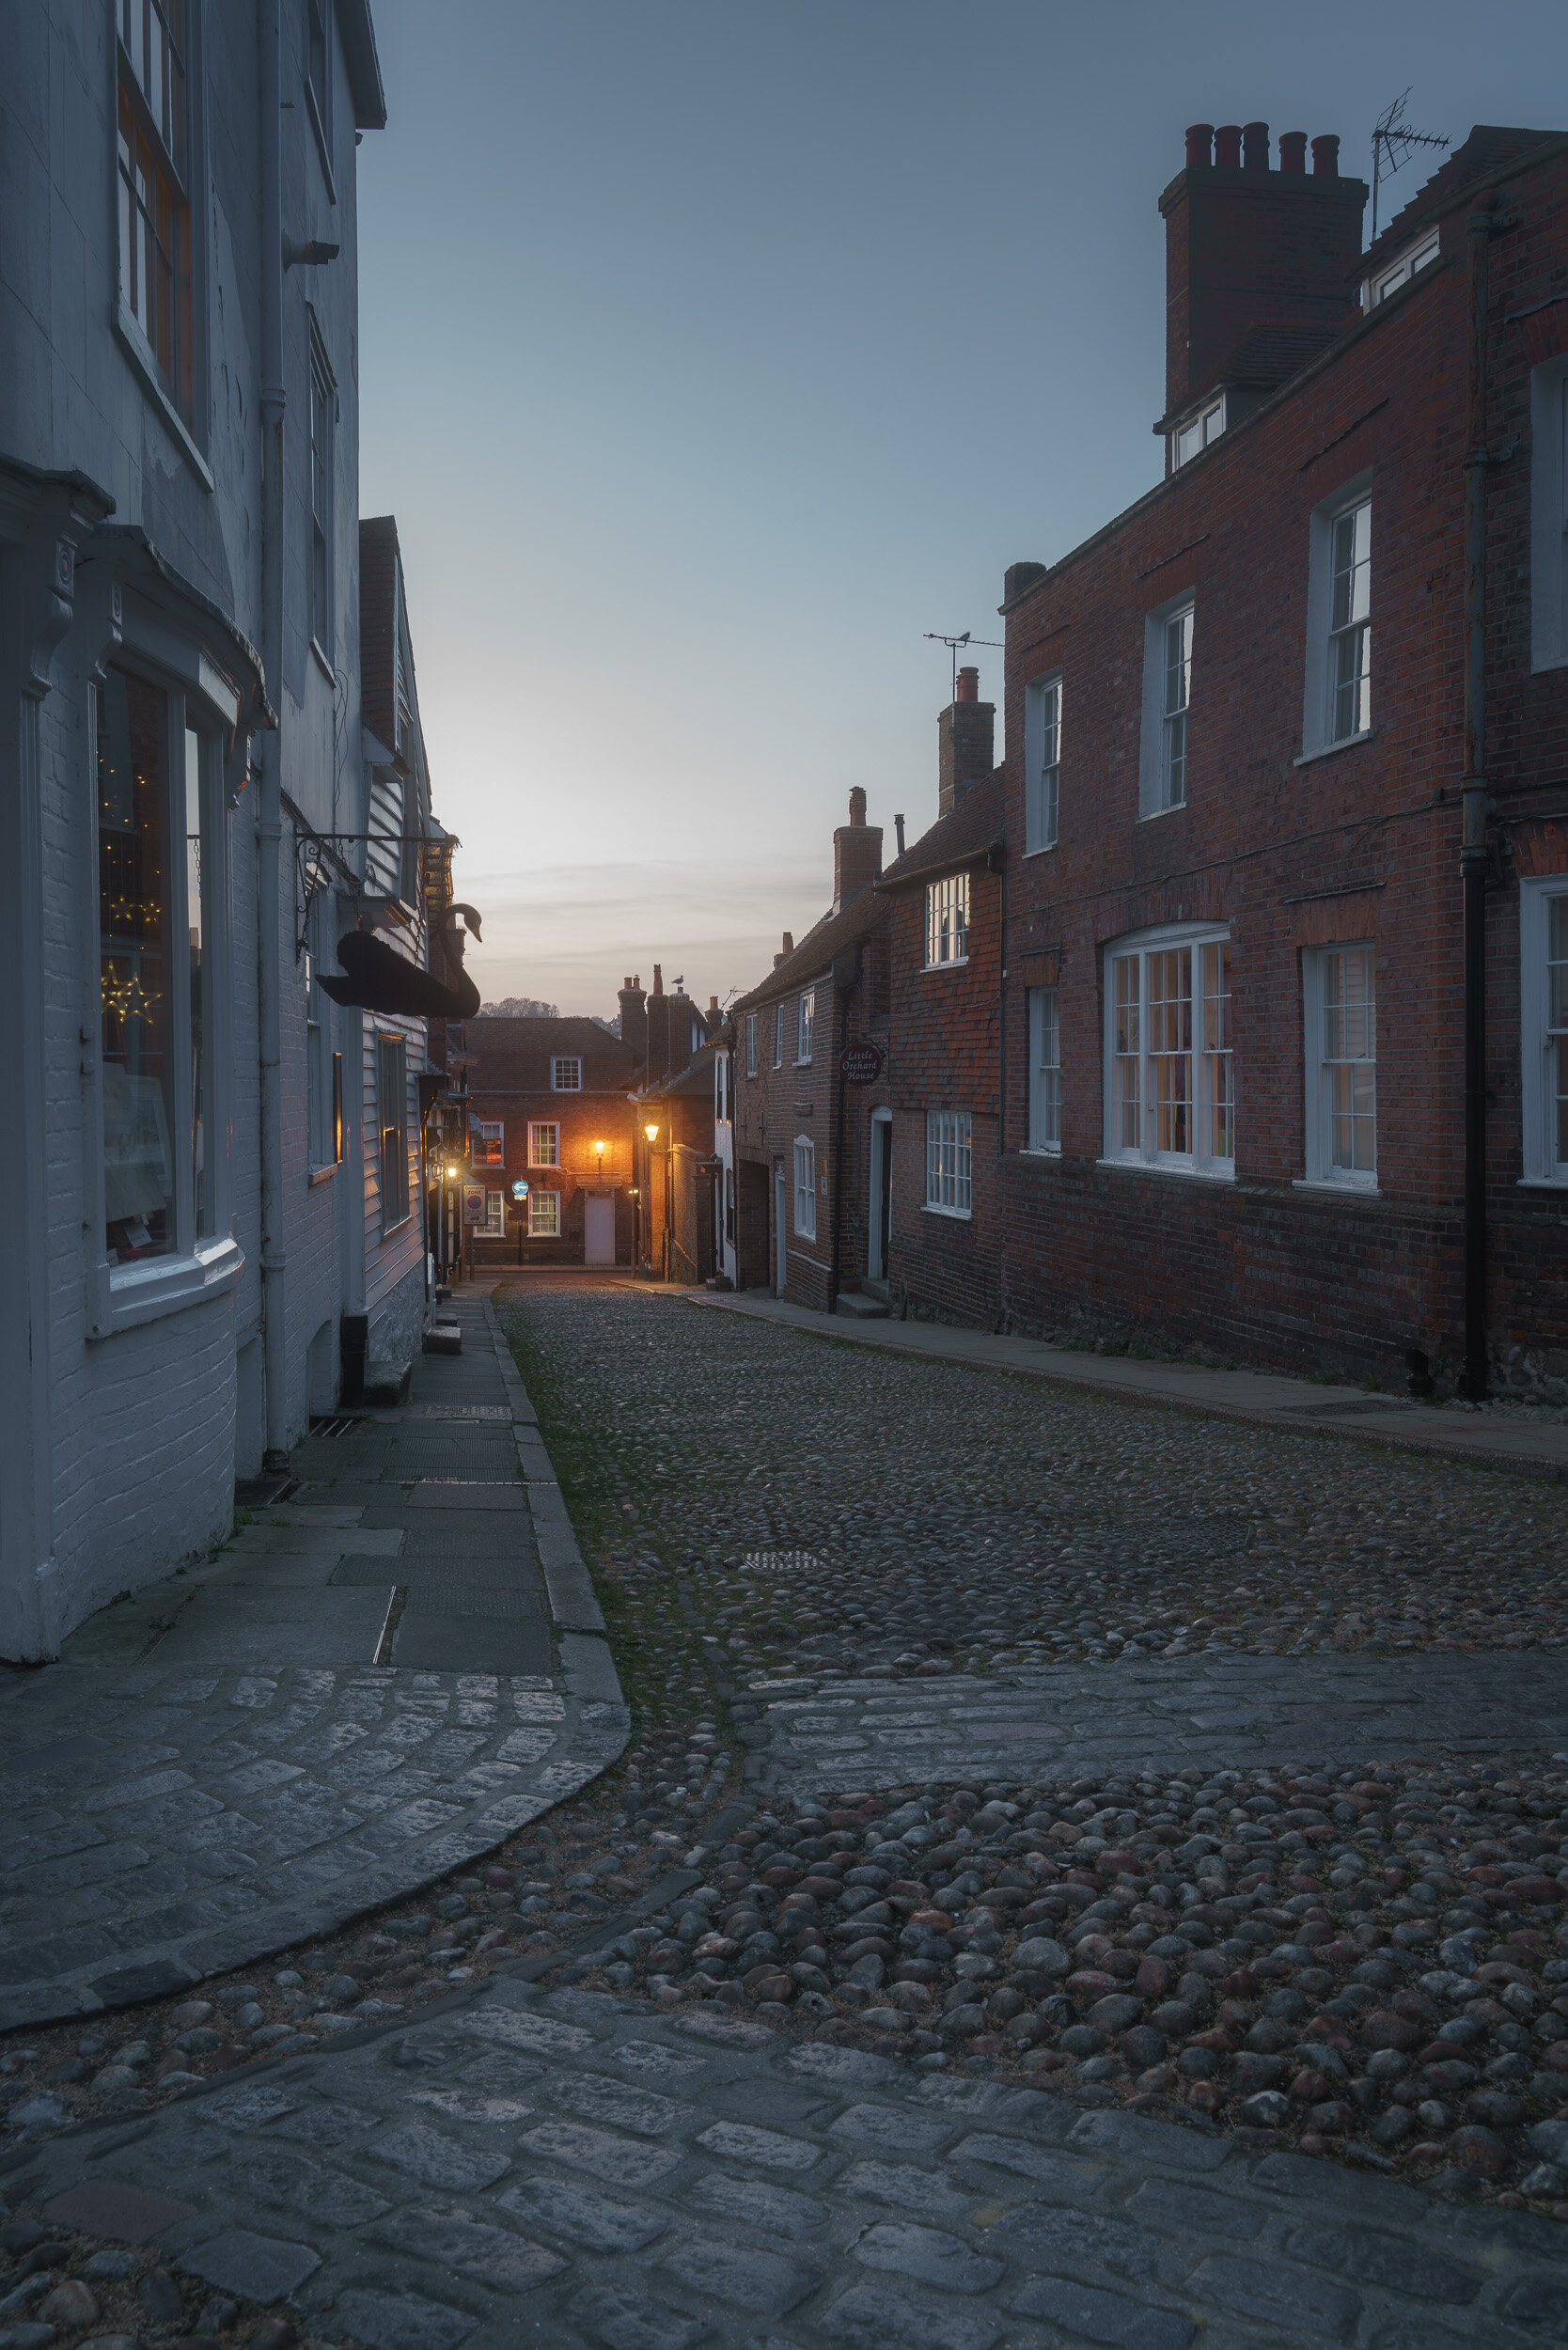
Mermaid Into West Street

The Mint Mood - Notice how the hanging lights also lead the viewer’s eye through the image.
What Locations?
Urban Landscapes at night can be taken at various locations:
Cities
Towns
Beachfront (with shops/amusements)
City & Town rivers
Outside cities and towns (Distance Shot of the town/city
Drone shot above the city
Architecture in cities and towns
Churches
Castles
Streets
Busy Main Roads
Town or City Squares
Long Exposure
If you manage to capture the night sky just before it goes dark, anything from the sunset to the blue hour, consider using an ND filter to create a beautiful Long Exposure. Try standing on the South Bank of the River Thames, facing St Paul's and grabbing those long exposure skies above the Cathedral. Or any building that works for you in your home town or city.

Jeake’s House
Light Trails are another great urban landscape idea to shoot at night. Perhaps you could combine those Light Trails as a leading line, with the city skyline in the distance.
Available Light
I've said it before, Night Street Photography is all about the lights coming from the shops, street lights, moonlight and vehicles. Use those lights to your advantage, photographing the light reflections on the walls and the roads. Notice how the highlights reveal texture and detail that are hidden in the shadows. Window lights and street lights can light a whole building up. Without man-made lights, there is no night street or urban photography.
To People or Not to People?
You can increase the ISO and speed up your Shutter Speed to include people in your compositions, even on a tripod. One of the most enjoyable and coincidental things about Urban Night Landscapes is that you have already set up your camera to get that composition that looks great with leading lines and perspective, etc. If you want to have someone in your composition, then all you need to do is wait and tweak a few settings. Conversely, if there are people walking through your shot and you don't want them in the frame, then waiting is the answer to that conundrum too.
I go through this process every time I am out taking photos.

Fish N Chips 2
Conclusion
There is quite a lot involved in learning how to shoot urban landscape photography at night, but I hope that these tips give you some skills in expressing your photographic intentions.
So what ideas do you have for snapping your streets at night?
Go forth and create.