The Street Photographers Guide to Aperture Priority
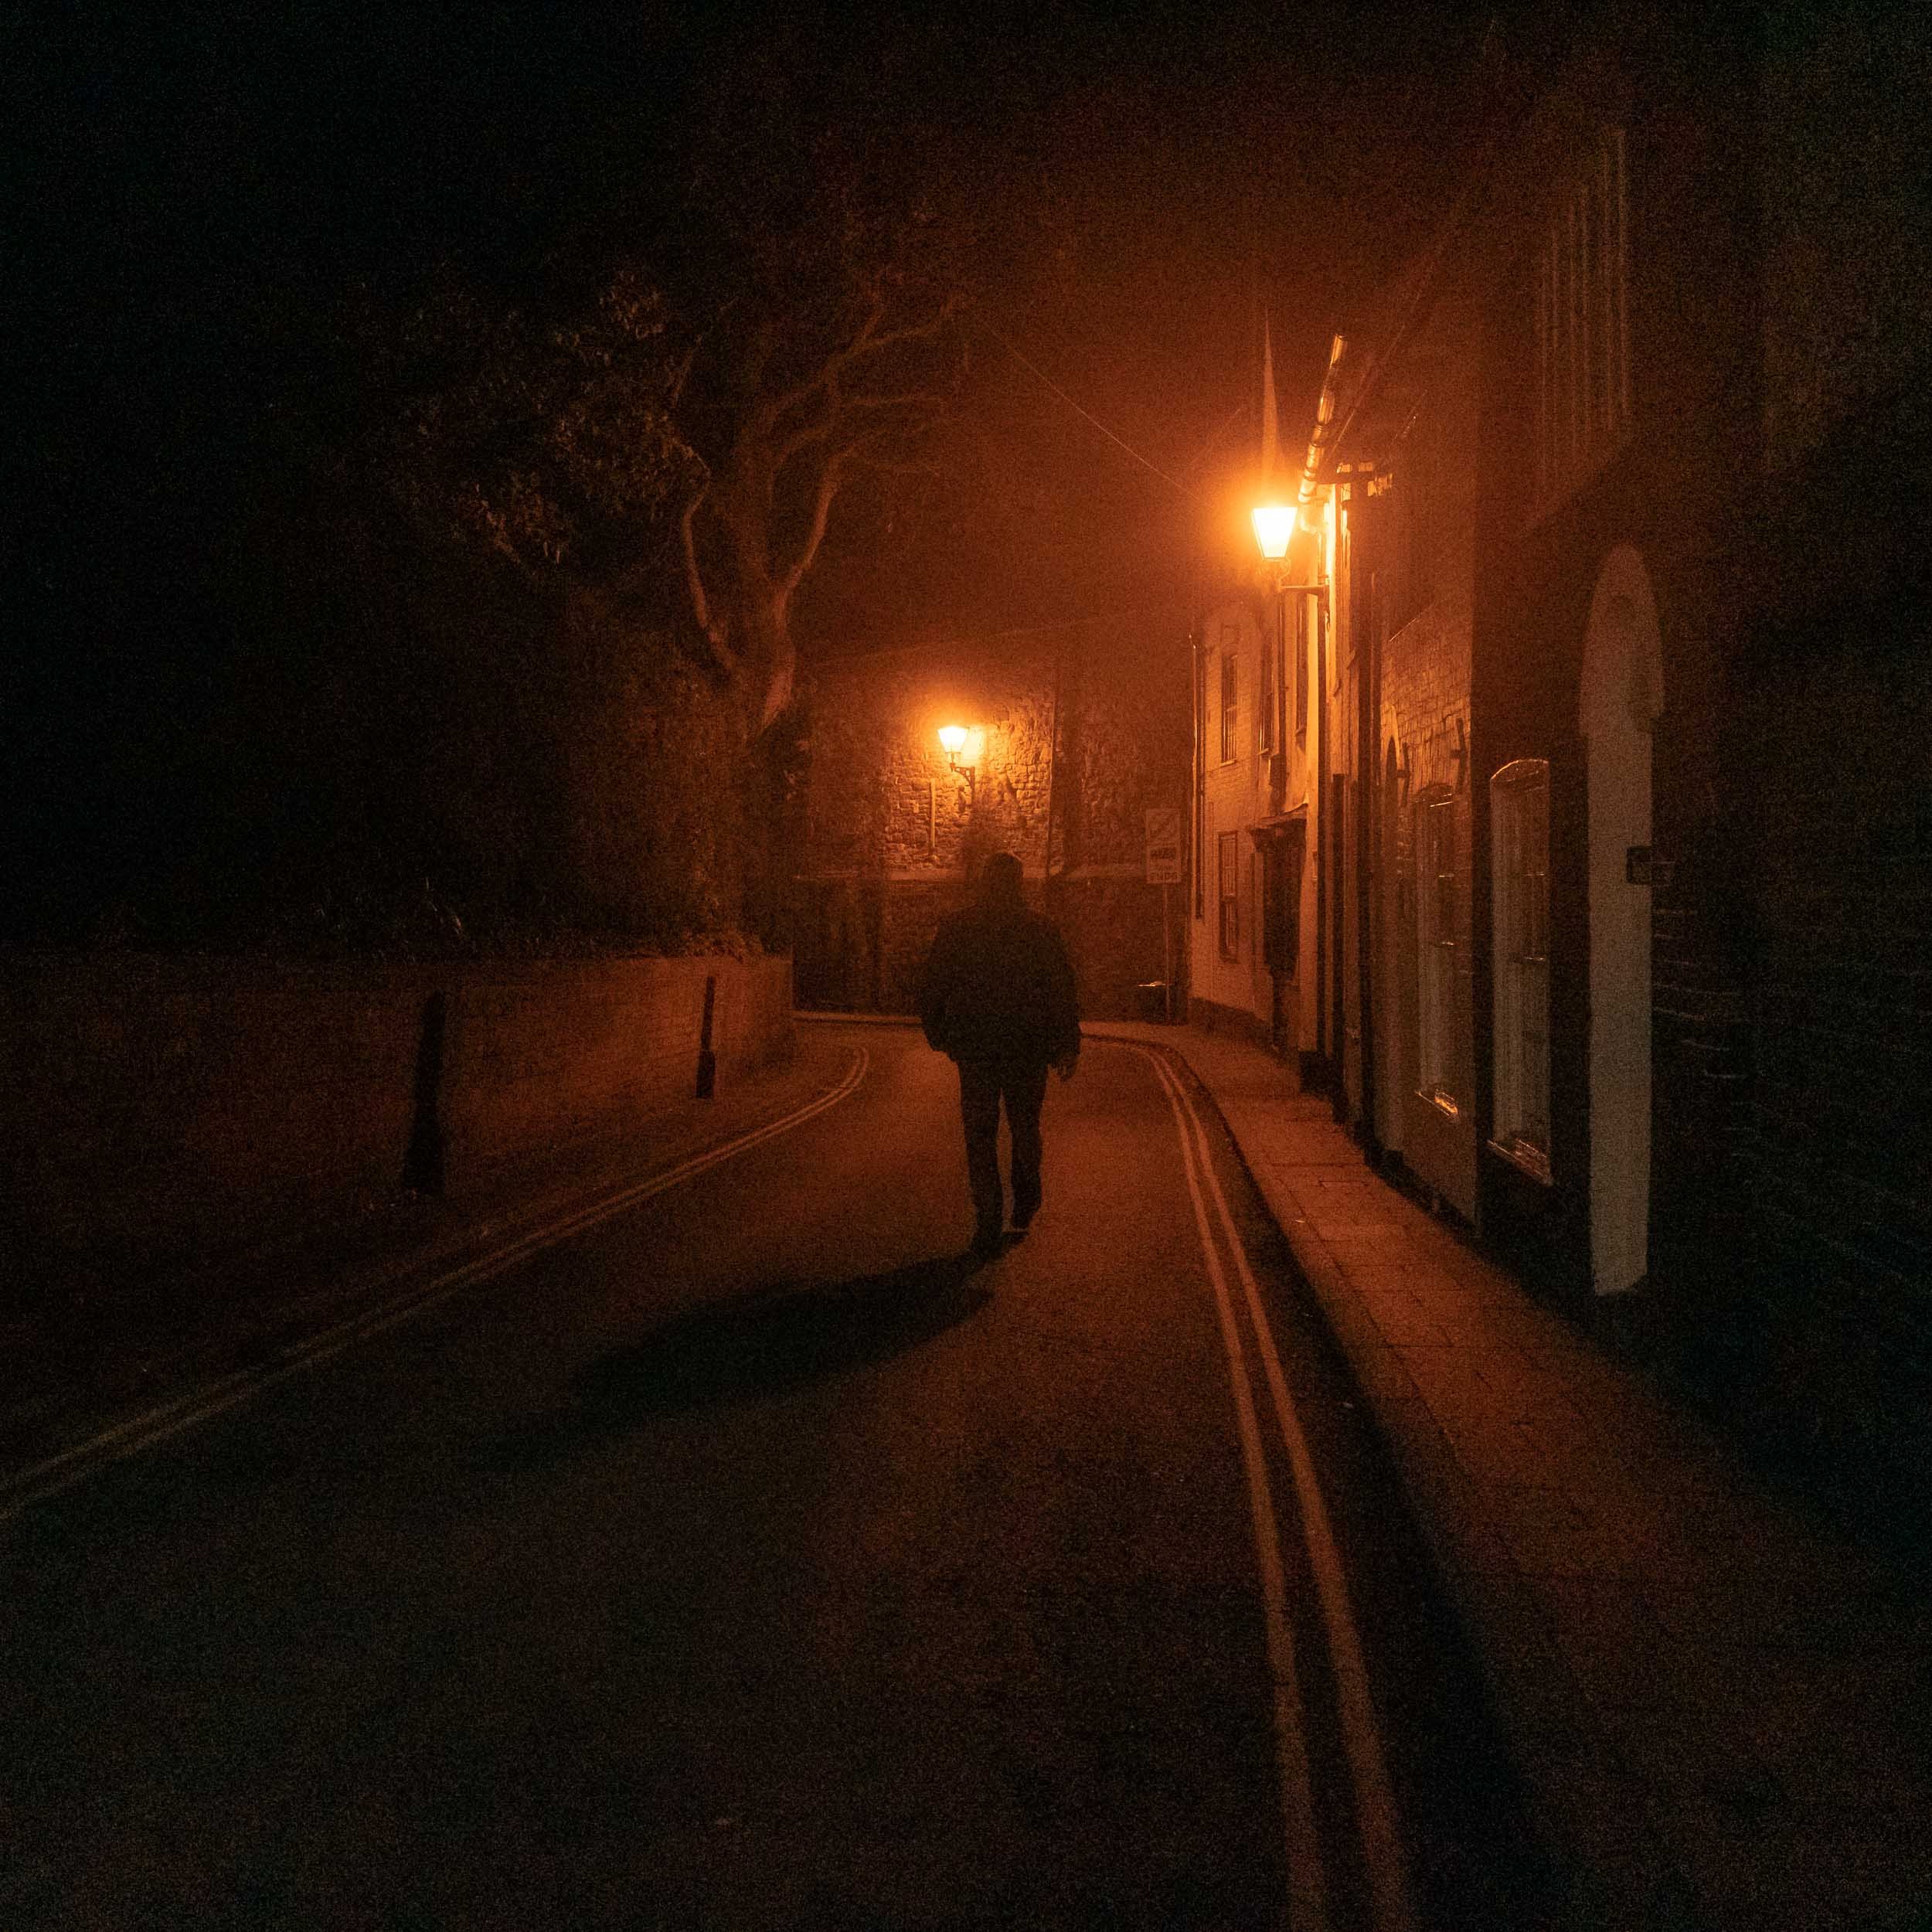
f /2.8 1/80 sec ISO 6400
Introduction
Aperture priority for beginners - this guide will help you if you want to go out and start shooting street photography today and want to have a fair amount of creative control over your camera settings and your images.
Let's get into it.
What is Aperture Priority?
It's pretty simple really. In Aperture Priority mode, you get to choose the aperture and your camera then picks the Shutter Speed to get the correct exposure. Your level of control also extends to picking the ISO.
What is Aperture?
When you change your aperture you are changing the size of the diaphragm on your lens. This ultimately lets more light in or closes down the diaphragm, affecting the amount of light entering your lens, depending upon which aperture you choose.
Wider apertures (f /1.2 - f/ 8) let more light in, whereas narrow apertures (f / 11 - f/ 22) make the whole of the diaphragm narrower, letting less light in through the lens to the camera's sensor.
If aperture priority helped simplify your shooting, my Daytime Street Photography Guide goes further, covering camera setup, exposure, focusing, light and practical ways to make stronger photos in daylight.

42 pages of practical daytime street photography guidance.
This updated guide gives you a clear, practical starting point for shooting stronger street photos in daylight and natural light. Inside, you’ll find advice on camera settings, focusing, exposure, reading light, choosing subjects, composition and working with everyday street scenes more confidently.
It has been expanded with more detail, clearer explanations and practical examples to help you get out shooting with more purpose and less second-guessing.
If you want a focused guide for daytime street photography, this is the place to start.
Downloadable PDF
What does Aperture do?
The wider the aperture the more background blur there will be in your images. That is why portrait photographers mostly shoot at apertures from f/ 5.6 - f /1.2, depending upon the situation and the shooting setup. Basically, they want to focus upon the subject and let the background go out of focus and/or fall into bokeh.
Shooting at a moderately wide aperture is very useful for street portraits as you may not want to completely blur out the environment that your subject inhabits, but you may want to blur it out enough to focus on your subject without background distractions.
On the opposite end of the scale, narrow apertures create a deeper depth of field. Therefore your images will be much sharper from the foreground to the background which is useful for cityscape photography and urban street photography where you are focusing on buildings, houses and streets without the people in them.
If you think about aperture in terms of exposure, the wider aperture that you choose the more light you are letting in, therefore the brighter the image will be. Narrowing the aperture will make your scene darker.
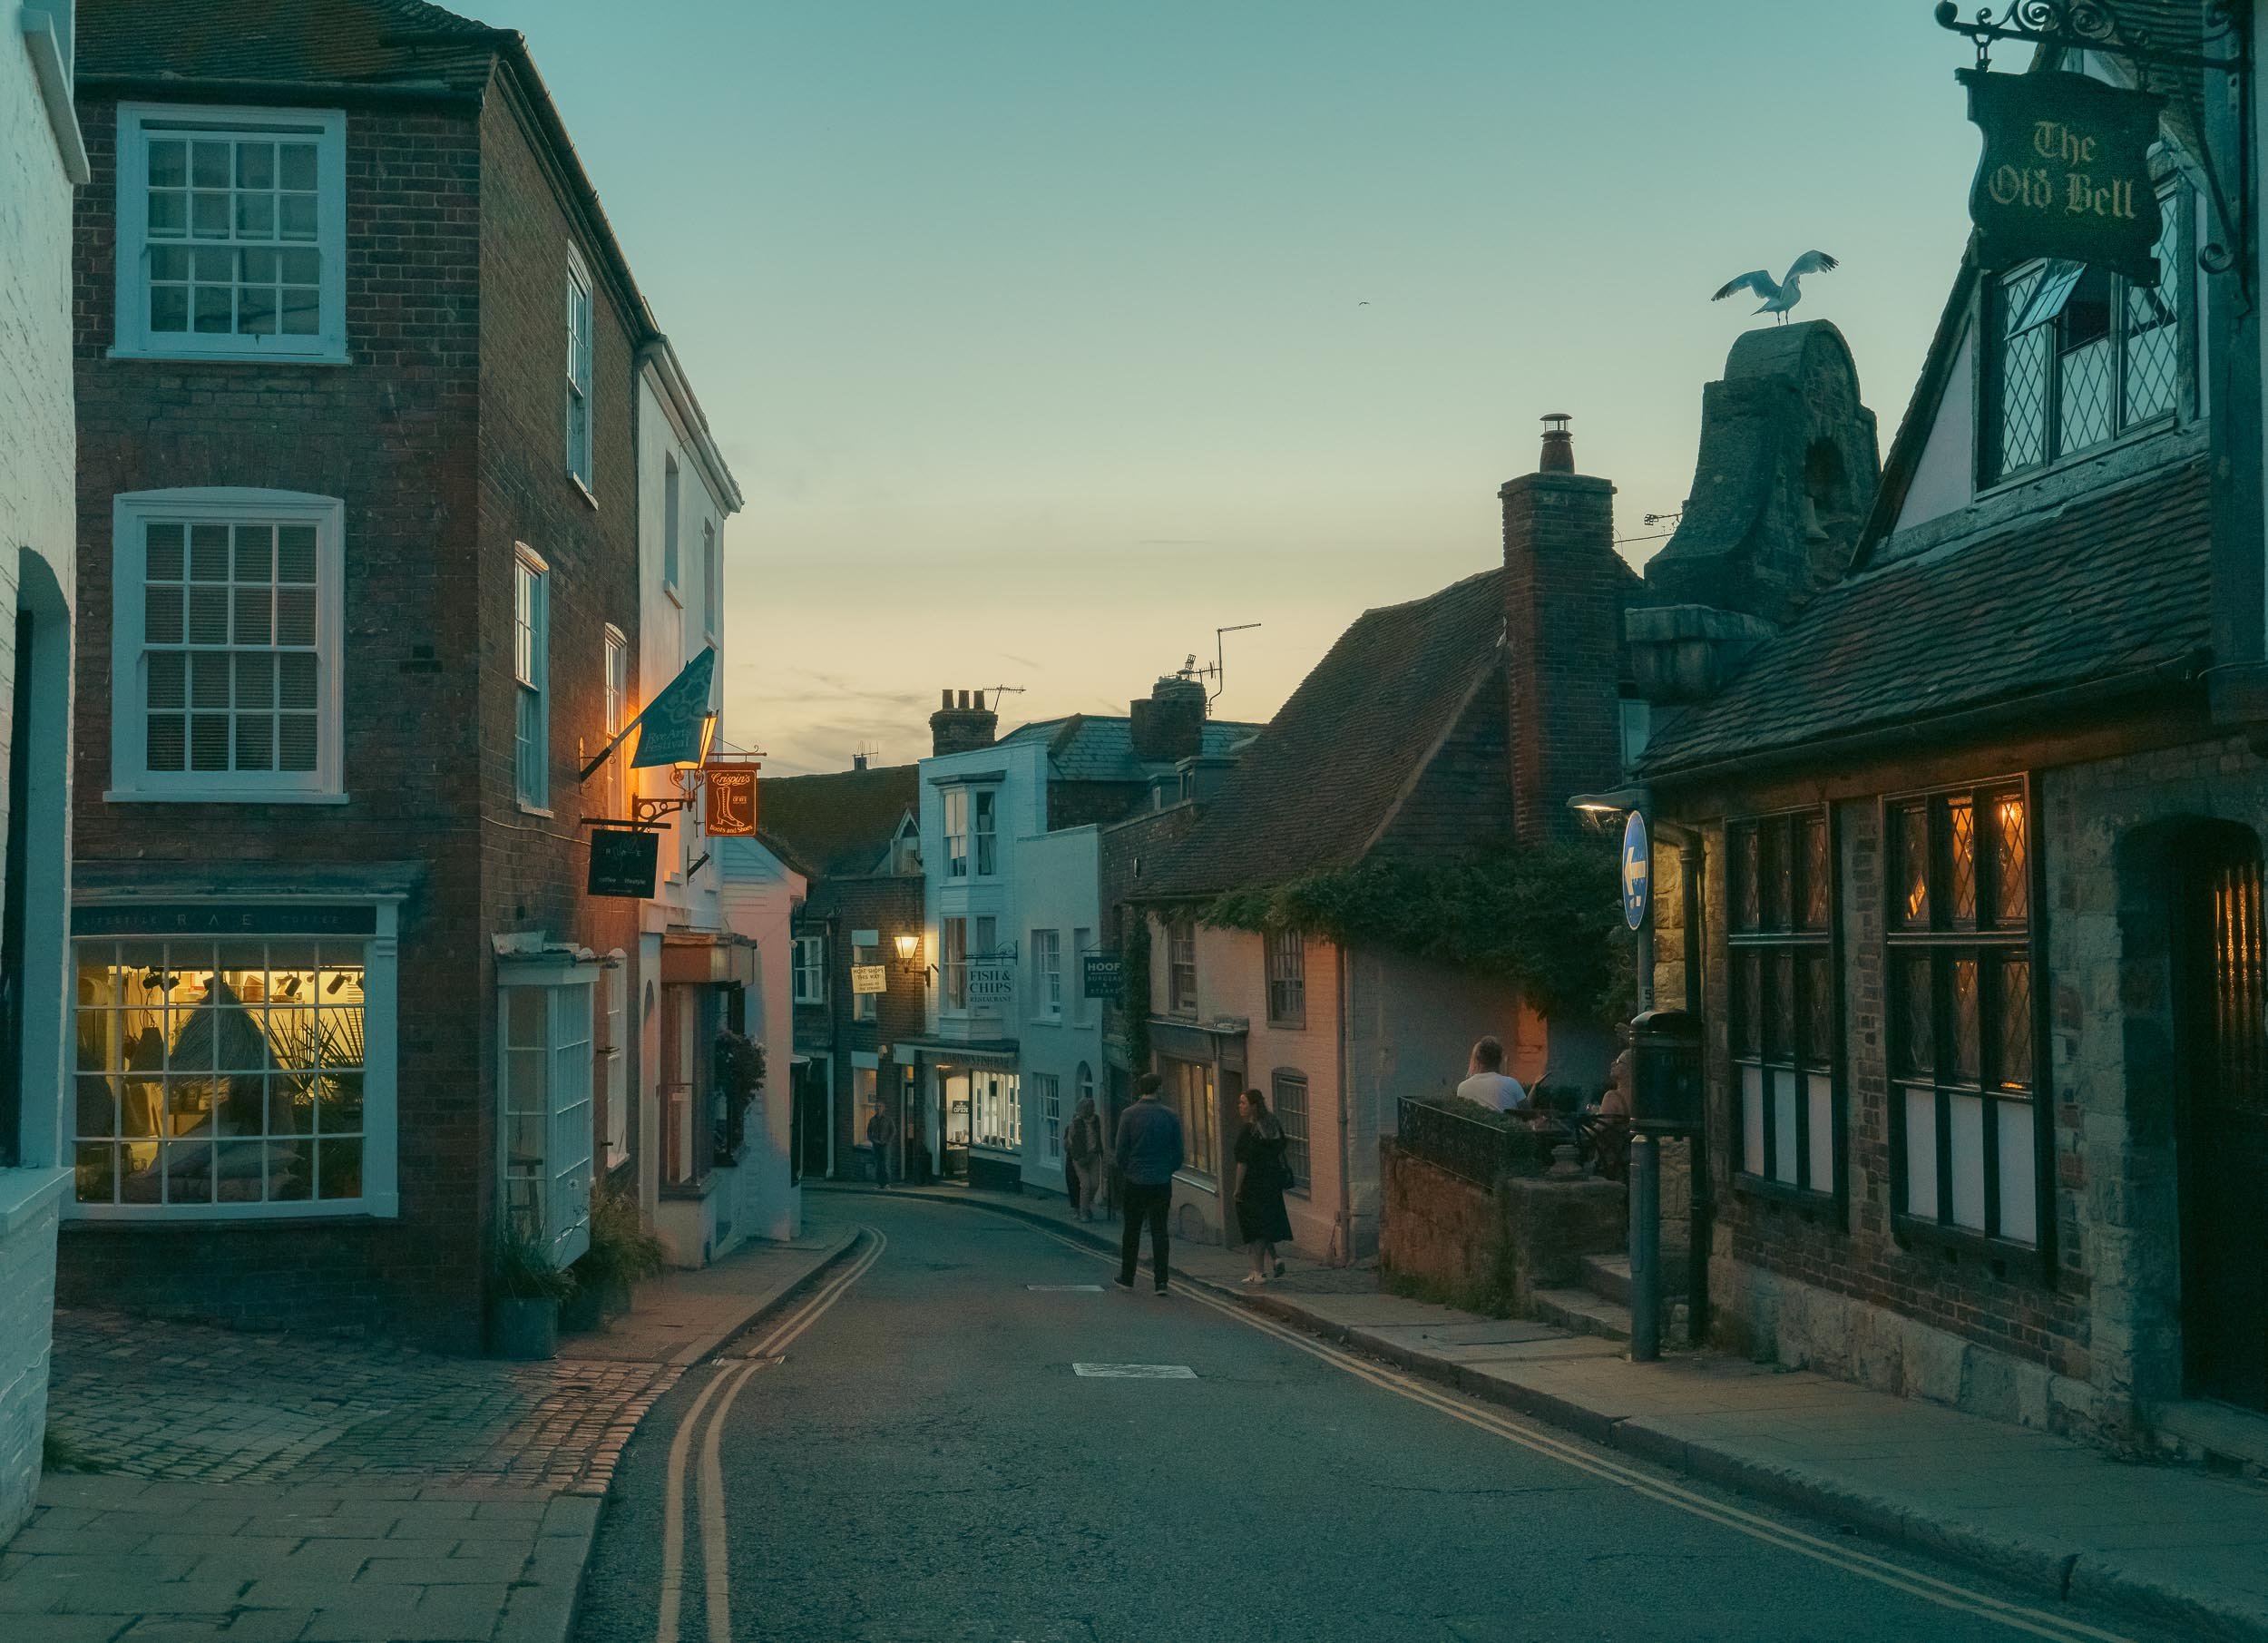
f /5.6 1/250 sec ISO 5000 - It was getting dark so I needed a fairly wide aperture to balance the exposure
How to use Aperture Priority
To use aperture priority the first thing to do is to turn your mode dial at the top of your camera to A or AV depending on your camera brand.
The next thing to do is choose your desired aperture. What aperture you use can depend on many factors, including the available light, the subjects that you are shooting and what kind of creative control that you want for your images. This will be discussed in a later section.
As I said earlier, you still have control over your ISO in Aperture Priority, so also depending upon what you are shooting you're going to need to choose your ISO based on your lighting situation.
Whilst shooting in Aperture Priority, it may be necessary to use Exposure Compensation to make sure that any highlights are not overexposed.
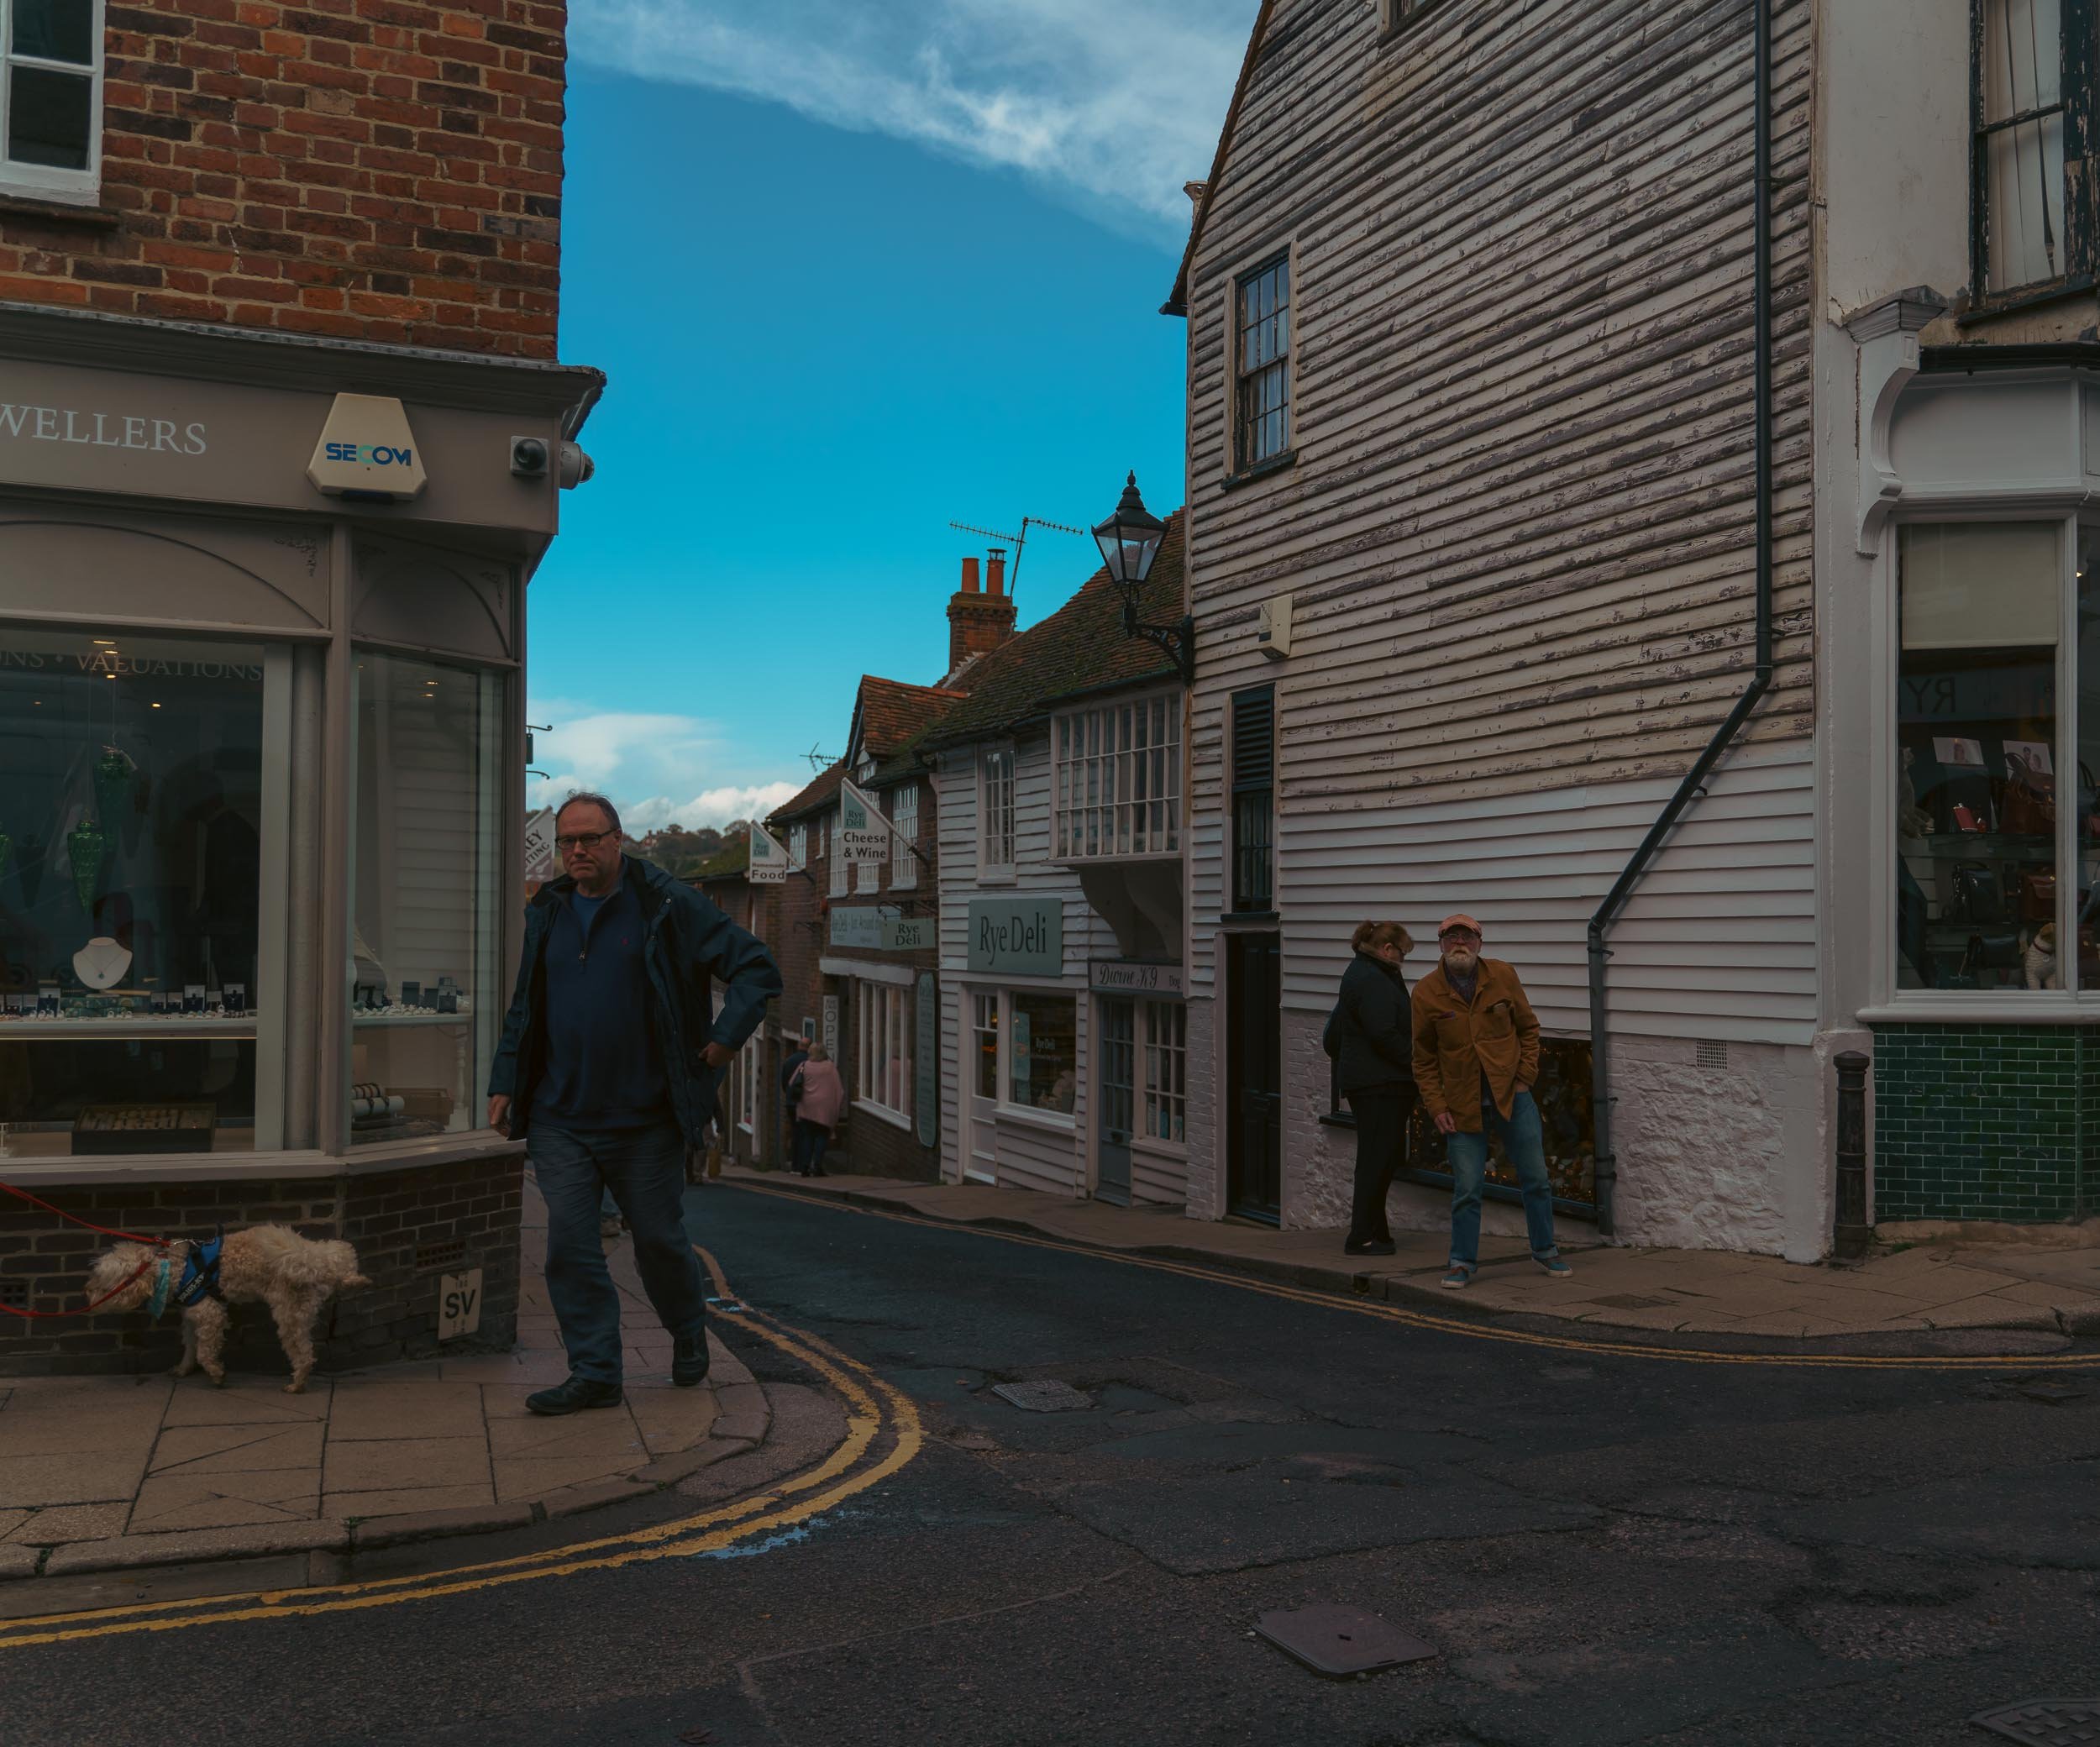
f /3.2 1/1000 sec ISO 100 -Notice how everything is sharp even at a wide aperture. This is because I was far away from my subjects. The closer you are to your subject the more background blur there will be and if you are far away you can still get a decent amount of depth of field even at wide apertures.
How to use Aperture Priority for Street Photography
Daytime Street Photography
If you set a narrow aperture of anything between f /11 - f/22 and you are in or enter fairly dark conditions, there is a good chance that the camera will pick a slow Shutter Speed to compensate. A slow Shutter Speed lets more light in as the shutter covering the sensor, is open for a longer time. This could result in people looking blurred in your photos. Therefore, choosing an aperture of around f /4 - f /8 is optimal for daytime street photography, and unless you are using Auto ISO, keeping your ISO fairly high (400 - 1600), will ensure that the camera picks a fast enough, action stopping, Shutter Speed. However, you may need to adjust your ISO to a different value, depending upon the weather and the amount of available light.
You also have the option of using the Exposure Compensation dial if you see through the viewfinder or on the camera's LCD screen, that there is a chance for overexposure or underexpose.
Night Street Photography
At night you want to let as much light in as possible, therefore choose an aperture at the very wide end (f /4 - to f /1.8) depending upon how much ambient light there is from shop lights and street lights. You are going to have to keep your ISO high, approximately 3200 - 6400, so that your night shots are exposed properly. Alternatively, you can use Auto ISO with the minimum Shutter Speed function on your camera. At night there is always the strong possibility that street lights and shop lights will be overexposed, this is where Exposure Compensation comes into play. Just turn the dial to the minus - making sure that those street lights are not clipped and increase the shadows in post-processing.
Night street photography is a delicate balance of under and overexposure due to the extreme contrast of highlights and shadows. As you practice and improve your craft, balancing the exposure becomes easier and quicker.
Urban Landscapes on a Tripod
If you are simply looking to photograph buildings or streets that are empty and you are using a tripod, then you have the luxury of using ISO 100 and a slower Shutter Speed, together with the aperture of your choice, as you do not need to quickly capture action. You can take your time getting the perfect composition.
Street Portraits
When you are inclined to shoot people on the streets you have a choice of whether you want the environment that your subject is in to look sharp and in focus, or you may want the background to fall out of focus. Therefore choose a narrow aperture of f /5.6 - f /1.2 depending upon your creative needs.
Get Creative with Aperture Priority
You can choose which aperture you want to use to suit the vibe that you want for your images.
The wider apertures give your photos a softer, more ethereal look, whereas a narrower aperture may be good if you want as much depth and detail as possible, where you might want the whole scene to be in sharp focus.
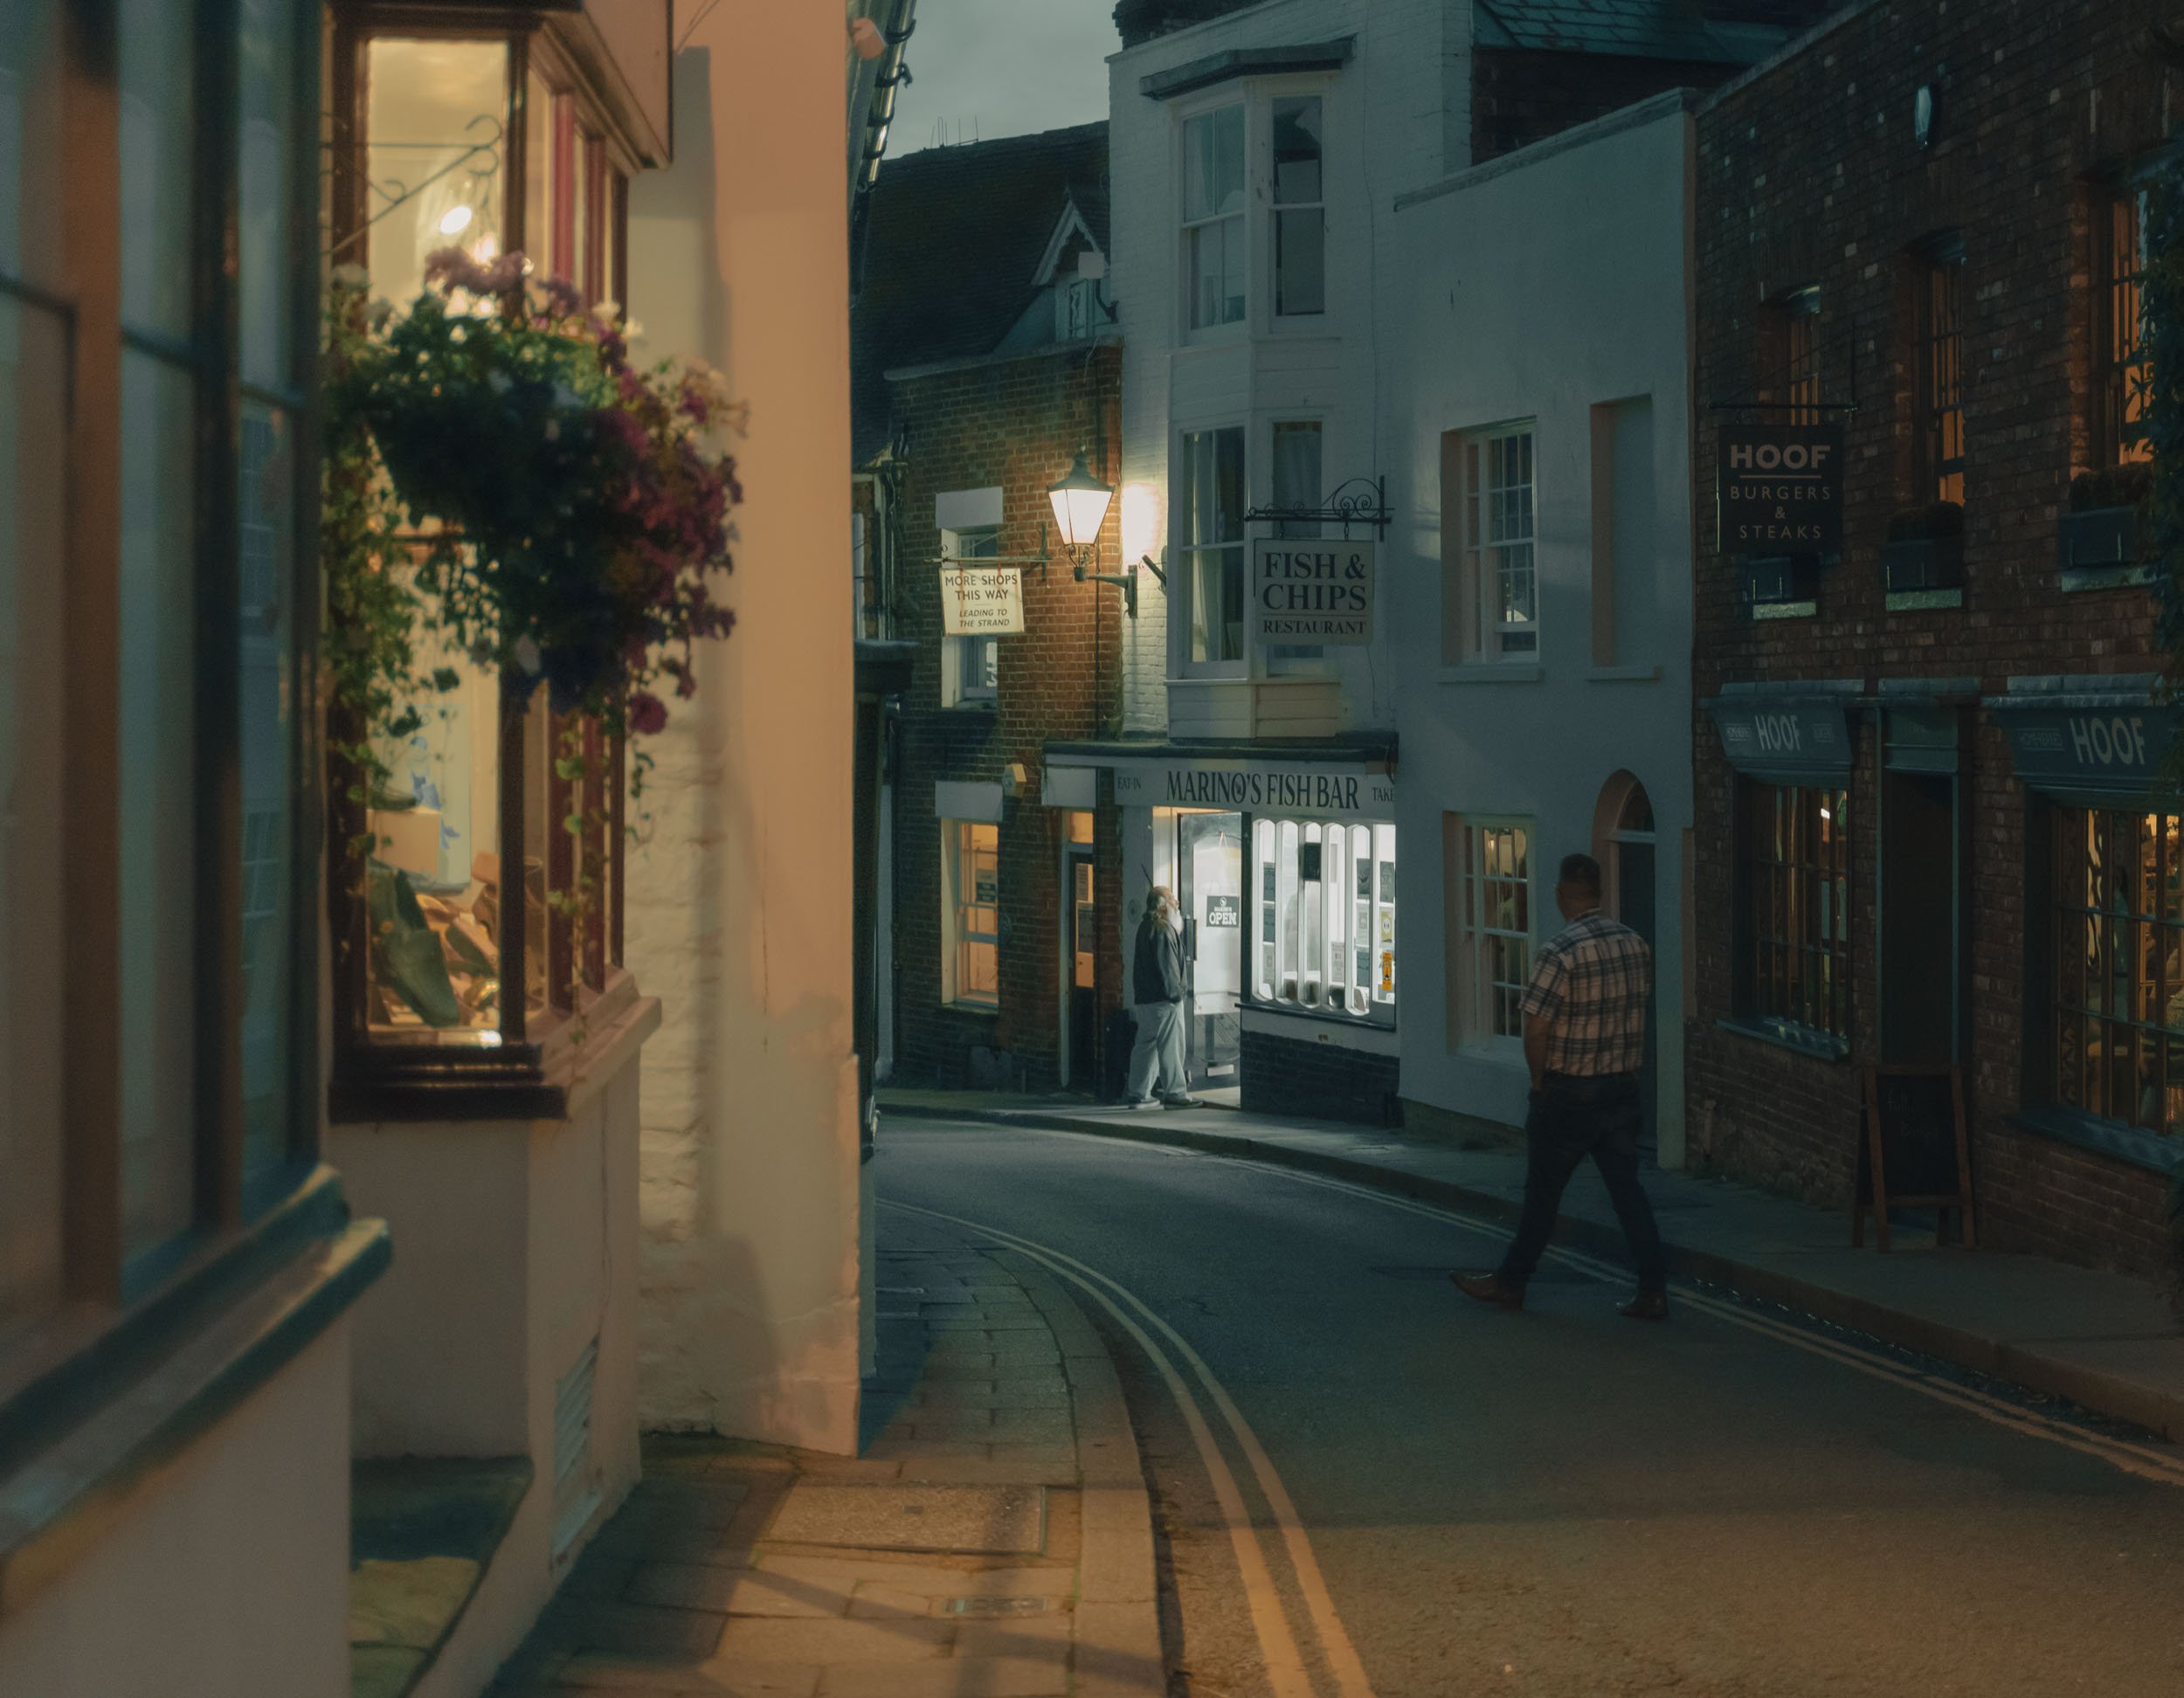
f /2.8 1/80 sec ISO 4000 using Auto ISO, my minimum shutter speed is 1/80 sec. I know that any slower than this I will get blur in my images. I also wanted a soft look for this image, particularly in the foreground, so I shot at a very wide aperture.
Auto ISO
In conjunction with aperture priority, you can use Auto ISO. This function is great for two reasons:
You can set an ISO range, which is great for night street photography, which allows you to forget about choosing ISO and leave it to the camera to choose based on the range of ISO that you have chosen. For example, if you are shooting at night you will probably want to keep your ISO quite high so that you can get a proper exposure. Therefore, an ISO range of 1600 to 6400 would be a good choice for Auto ISO.
Along with setting the ISO, you can choose the minimum Shutter Speed. When you are shooting at night and you know that the minimum shutter speed you can use to get sharp, in-focus shots while holding the camera, is 1/100 sec, then you can set this shutter speed as your minimum.
How it works
If you are shooting at f /5 and you have your Auto ISO set to 1600 - 6400, and you walk into a particularly dark area, instead of your camera going below the minimum Shutter Speed that you set to something like 1/80 sec, it will keep the shutter speed at the minimum that you selected i.e. 1/100 sec and will instead raise the ISO from your base of 1600 to 3200 or higher, if needed.
This is brilliant as you do not need to worry about what Shutter Speed you are shooting at because you know the camera will not go below the minimum Shutter Speed that you are capable of using when hand holding your camera at night.
Conclusion
I hope that this guide gets you right into the Aperture Priority setting which will ultimately allow you to take photos fast and creatively.
Go forth and create.